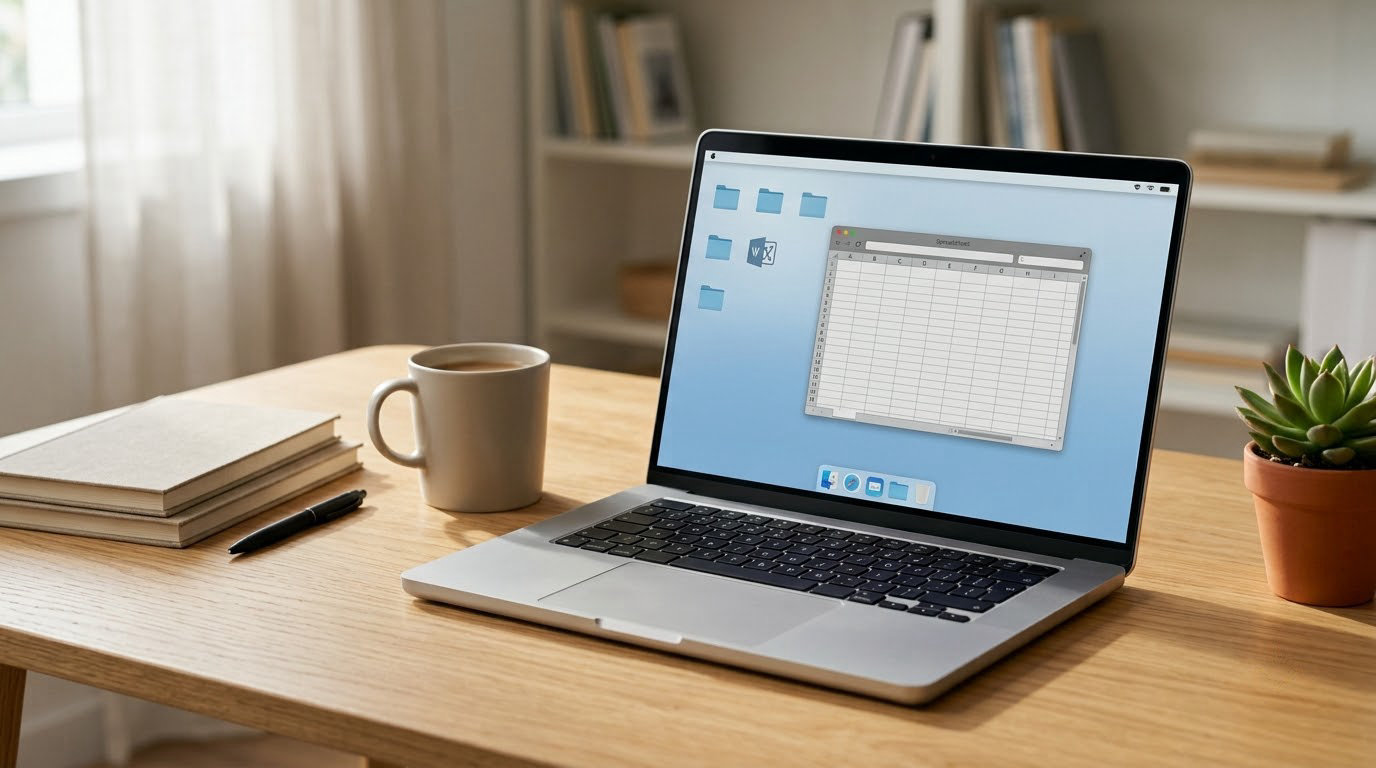
You can run Windows software on a Mac three ways: a virtual machine that runs a complete Windows desktop inside a window, a compatibility layer such as Whisky or CrossOver that translates a Windows program’s calls into macOS ones, or Boot Camp, which dual-boots real Windows on an Intel Mac. A fourth option is remote access to a Windows PC you already own or a cloud one.
Which one you should use comes down to two things before anything else: what chip is inside your Mac, and what the software actually needs. An M-series Mac cannot use Boot Camp at all. A 1990s accounting package with a hardware dongle needs a full Windows install, not a translation layer. Get those two answers right and the choice takes about a minute.
I have watched friends make the expensive mistake here — buying a Mac, discovering the one program they depend on won’t cooperate with a compatibility layer, and ending up with a virtual machine subscription and a Windows licence on top of the hardware. A ten-minute check up front avoids all of it. Here is how to run Windows software on a Mac, method by method, with the honest limits of each.
Table of Contents
- What You Need Before You Run Windows Software on a Mac
- Step-by-Step: Choose the Right Way to Run Windows Software
- Use Boot Camp on an Intel Mac
- Use Parallels Desktop for Windows Apps
- Use VMware Fusion
- Use CrossOver for Supported Windows Apps
- Use Wine or Whisky for Simple Compatibility Needs
- Use a Cloud or Remote Windows Computer
- Common Mistakes
- Boot Camp Assistant is nowhere to be found
- Windows 11 won’t install in Boot Camp
- The virtual machine is slow
- The app crashes under CrossOver or Whisky
- You don’t want to buy the same app twice
- A game won’t launch at all
- Printing and USB devices don’t work
- The Mac gets hot and the battery dies fast
- Files end up in the wrong place
- Frequently Asked Questions
- Can Apple silicon Macs run Windows software?
- Do I need a Windows license to run Windows software on a Mac?
- Is it better to use Boot Camp or a virtual machine?
- Can I run Windows games on a Mac with Parallels or VMware?
- How do I share files between macOS and Windows software?
- Will CrossOver or Wine run every Windows application?
- Conclusion: Start With the Least Complicated Option
What You Need Before You Run Windows Software on a Mac
Four things determine which method will work. Check them in this order.
1. Find out which chip your Mac has
Click the Apple menu, then About This Mac. If the line reads Apple M1, M2, M3, M4 or later, you have Apple silicon and Boot Camp is not an option. If it names a Core i5 or i7, you have an Intel Mac and every method below is open to you.
This single fact rules out more paths than anything else. Apple’s Boot Camp Assistant exists only in macOS on Intel Macs, and the option is simply absent from System Settings on Apple silicon. A lot of people discover this after they have already bought the machine, which is why it is worth checking on day one if you are choosing between a Mac and a Windows laptop.
2. Work out what the software requires
Look at the vendor’s system requirements before you pick a method. Three categories come up again and again.
- Plain desktop software — an office suite, a note-taking app, a small utility, a single-player game with no anti-cheat. A compatibility layer usually handles this.
- Software with services, drivers or enterprise licensing — anything that installs a kernel driver, expects a USB dongle, checks a corporate VPN certificate, or is tied to a site-wide licence server. This needs a full Windows installation in a virtual machine.
- Antivirus and disk utilities — these write to raw disk sectors and often refuse to run anywhere except a real, bootable Windows. Boot Camp on Intel, or a Windows PC you own, is the honest answer.
3. Make sure you have administrator access
Every method here installs software at system level, so you need the admin password for your Mac account. You also need to approve what macOS calls ” unidentified developers.” When you first open a downloaded app and macOS blocks it, go to System Settings, then Privacy and Security, and scroll down to the blocked item. Click Open Anyway. Nothing here requires disabling Gatekeeper entirely, and you shouldn’t.
If your Mac is managed by your employer or school, the IT department controls this. University help desks handle this question constantly, and their answer is usually the same: a virtual machine is permitted, Boot Camp often is not, and some institutional licences simply won’t activate inside one.
4. Check storage, memory and the licence question
A working Windows 11 installation wants roughly 60 GB of disk space once it settles, and running it smoothly wants 8 GB of Mac memory allocated to the virtual machine. On a Mac with 8 GB total, a Windows VM will feel tight; a compatibility layer uses a fraction of that.
On the licence: you can install and use Windows 11 without entering a product key, and a watermark sits in the bottom-right corner until you activate. Unactivated Windows runs with restricted personalization — you can’t change themes, wallpapers or some settings — and Microsoft states plainly that it is unlicensed. For evaluating software, for coursework, or for a short trial that is fine. For daily work over months, get a key, and if a hardware-bound PC licence came with an old machine you no longer use, Microsoft’s activation page can transfer it. The site has a walkthrough of finding a Windows product key if you are not sure what you already own.
Step-by-Step: Choose the Right Way to Run Windows Software
Match the method to how often you need Windows and what kind of program it is.
- Occasional use, one or two simple programs, no Mac version anywhere? Start with Whisky or CrossOver. No Windows install, no licence question, and you can delete everything in minutes if it fails.
- You need Windows several times a week for real work — Excel macros, a line-of-business tool, a course program, anything with an installer and a licence server. Use Parallels Desktop or VMware Fusion.
- You want genuine Windows with no translation overhead and own an Intel Mac Use Boot Camp. It is the fastest and the least surprising, and switching costs you a reboot.
- You want to play Windows games on Apple silicon A virtual machine is the only route that runs at all. Expect compromises on anything with kernel-level anti-cheat.
- You have a Windows PC at home or office, or a cloud subscription Skip the local setup entirely and use remote desktop. The software is already installed and configured.
Two rules of thumb that hold up most of the time. One app with no drivers and no services can go through a compatibility layer. Anything with installers, background services, drivers or a corporate licence belongs in a virtual machine. And if the software is important enough that its failure would stop your work, test it in the cheapest method first.
Use Boot Camp on an Intel Mac
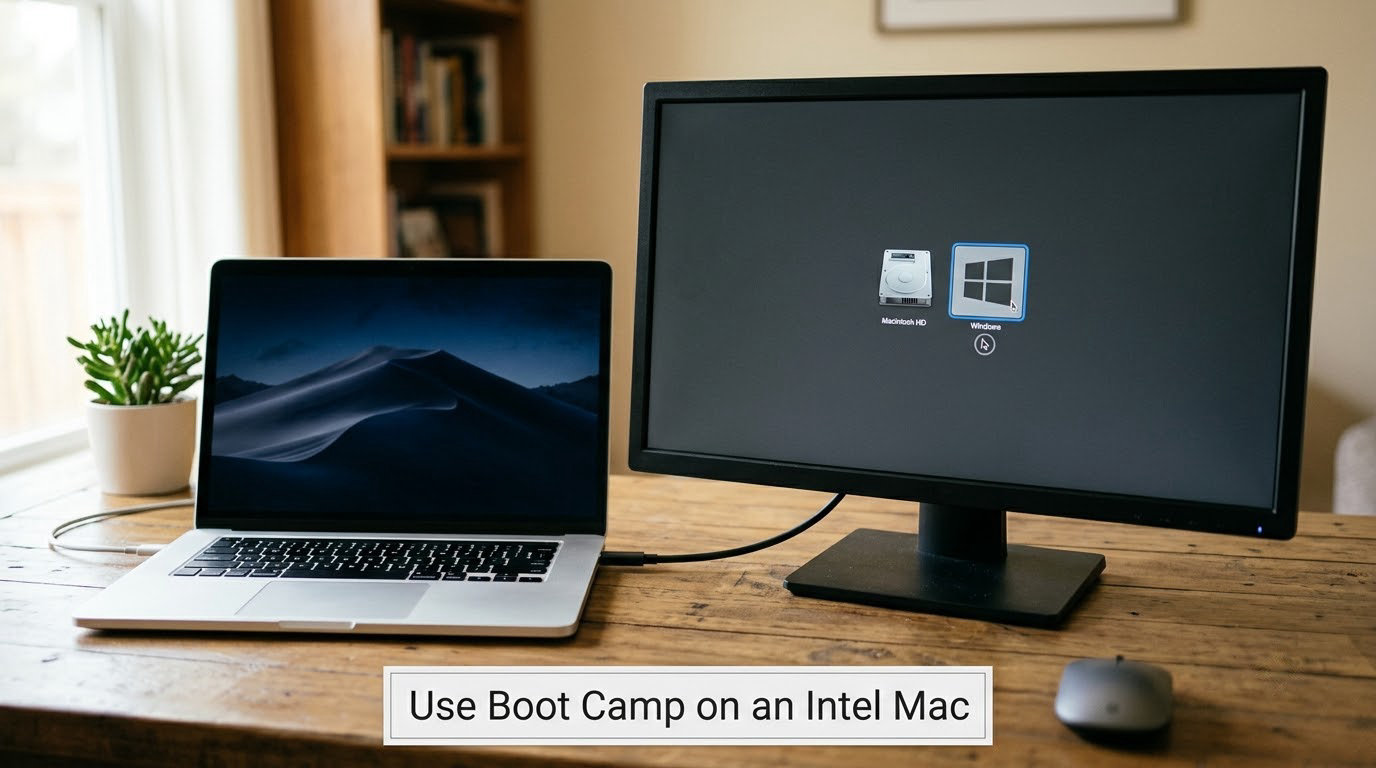
Boot Camp is the closest to the real thing: genuine Windows, booting natively, using the Mac’s real hardware. The trade-off is that you reboot to switch between macOS and Windows, and you give up disk space permanently to the partition.
It only exists on Intel Macs. On Apple silicon there is no Boot Camp Assistant anywhere in macOS, no matter how you search for it. If you have an M-series Mac, skip to the next method.
Setting it up
Open Spotlight with Command and Space, type Boot Camp Assistant, and press Return. Apple only ships the app when your Mac meets the requirements, so if it does not appear at all, that confirms the Intel-only rule rather than a broken system.
In the Boot Camp Assistant window, click Continue past the introduction. Choose Install Windows 7 or later and a version — Windows 11 if your Mac’s T2 chip and firmware support it, otherwise Windows 10. The assistant downloads a Windows ISO, creates the partition, and then restarts into the Windows installer.
While Windows installs, nothing on your macOS side is at risk; Boot Camp puts the Windows partition on a separate volume. After installation finishes, macOS installs the Boot Camp drivers, which is what makes your trackpad, keyboard, Wi-Fi and SD card work properly inside Windows. Install them before you judge how the performance feels.
To switch, restart and hold the Option key. The boot picker appears with macOS and Windows as separate volumes. Hold Option at every boot from then on and you get that menu every time, which is worth the habit.
The Windows 11 problem on older Intel Macs
Windows 11 requires a Trusted Platform Module 2.0, and Macs built before late 2018 or so don’t have one. If Boot Camp Assistant offers no Windows 11 option, that is the reason. Windows 10 installs normally on those machines and still runs plenty of the software people need.
Microsoft does allow unsupported hardware with a bypass, and there are custom Windows 11 ISOs that remove the TPM and Secure Boot checks. I’d treat that as a last resort for a machine you are not depending on. Windows 10 is the cleaner path, and it is the supported configuration for older Intel Macs.
Choose Boot Camp if you own an Intel Mac, need real Windows at full speed, and don’t mind rebooting. Also choose it if you are stuck on software that refuses to run any other way, like old antivirus scanners or forensic tools.
Use Parallels Desktop for Windows Apps
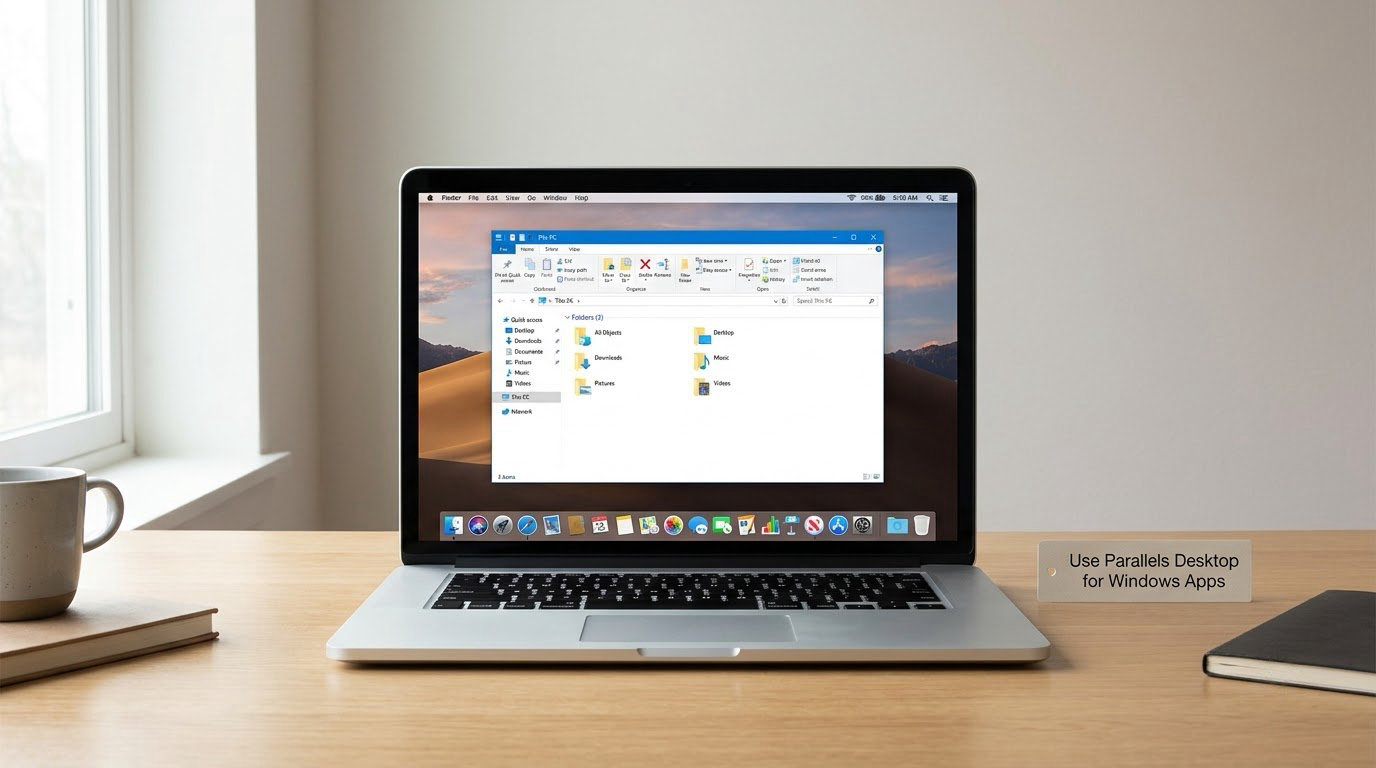
Parallels Desktop is what most people mean when they say running Windows on a Mac. It installs a complete, licensed copy of Windows inside a macOS window, and the app’s icon appears in your Mac Dock like any other program. No rebooting, ever.
It works on both chip types, and the difference matters. On Apple silicon, Parallels runs Windows 11 ARM, which has a translator built in that converts x86 and x64 instructions to ARM on the fly. Most ordinary 32-bit and 64-bit business software runs near-natively, because those instructions translated at the processor level. On Intel Macs, Parallels runs standard x64 Windows with no translation at all.
Setting it up
Download Parallels Desktop from parallels.com and install it, then open it from your Applications folder. The first launch walks through a few choices: whether the virtual machine is optimised for Microsoft Office documents or for general software, and how many processors and memory to give it. The default of 4 GB of memory is workable; 8 GB is comfortable if your Mac has 16 GB or more.
Then click Continue. Parallels downloads Windows 11 itself on Apple silicon, so there is no ISO to source. On an Intel Mac you supply a Windows ISO yourself. Installation takes anywhere from ten minutes to half an hour depending on the machine.
After setup, two display modes matter. The default view puts the whole Windows desktop in one window. Coherence mode, toggled from the View menu or the green button, instead shows only the individual application windows floating over your Mac desktop, with their own icons in the Dock. Coherence is the reason Parallels feels native rather than virtual, and most people leave it on.
Licensing, files and resources
Windows needs its own licence, and it needs one that covers virtual machines. A Windows 11 Home or Pro licence works; a Windows 11 Pro licence lets you run more than one instance on the same Mac at a time. Don’t assume your old desktop PC key transfers — activation is tied to hardware changes, and a VM counts as different hardware.
Shared folders are set up in the VM’s settings under Sharing. Point a folder at your Mac’s Documents or Downloads and it appears inside Windows at the same path, so files move both ways without emailing anything to yourself. Clipboard sync and drag-and-drop work in both directions out of the box.
On resource use: a suspended VM costs almost nothing, so shut it down when you finish a task rather than leaving it running overnight. When a VM is active, CPU and RAM use climb noticeably and battery life drops — people notice this most on a MacBook. It’s not damage; it is just a second operating system sharing one set of silicon.
Choose Parallels if Windows is a daily part of your work and you want the most reliable experience with the least fiddling. It is the option that “just works” most often. Skip it if you need one small utility once a month — the subscription and the Windows licence together are overkill for that, and the Whisky route costs nothing.
Use VMware Fusion
VMware Fusion does the same job as Parallels, with a different price structure and a rougher first-run experience. Fusion is free for personal use; commercial or educational use moved to a subscription model after Broadcom acquired VMware, so check the current licensing terms for your situation before you commit.
Setting it up
Download Fusion from vmware.com and install it. The new virtual machine wizard opens, and the part that trips people up is the operating system selection: pick Windows 11 and then choose Microsoft Windows 11 ARM as the guest OS on Apple silicon, or Microsoft Windows 11 x64 on Intel. Getting this wrong means Windows installs but runs terribly, so match it to your chip.
Next, Fusion asks for a virtual hardware version. Choose the latest one offered unless you have a reason not to; older versions lose CPU and graphics support. You also set the amount of memory and disk space here. Give the virtual disk room to grow — a dynamically expanding disk starts small and grows as you install, but you cannot shrink it later without a third-party tool.
Windows itself is not bundled on Apple silicon, so point Fusion at a Windows 11 ARM ISO you have downloaded from Microsoft. On Intel, the same applies for the x64 ISO. The installation is otherwise the ordinary Windows setup, and after it finishes, install VMware Tools from the VM’s menu — that package provides the display driver, shared folders and the mouse integration that make it usable.
Fusion’s Shared Folders feature, under Virtual Machine > Settings > Sharing, links Mac folders into Windows the same way Parallels does. Its Coherence equivalent is called Unity Mode, and it gives you the same floating Windows app windows over the Mac desktop.
Choose VMware Fusion over Parallels if you want to avoid a per-year Parallels subscription, if you already know your way around virtual hardware settings, or if you need to run x64 Windows on an Intel Mac for a specific reason. Parallels wins on polish and on first-run time; Fusion wins on price and on how much you can tune.
Use CrossOver for Supported Windows Apps
CrossOver is a commercial compatibility layer from CodeWeavers. It uses the same underlying technology as Wine but wraps it in an interface with a database of install profiles — pre-written configuration for specific programs — plus direct access to their support team. That support is the real product. When an app fails, you can file a ticket and CodeWeavers has a track record of adding a working profile for it.
Setting it up
Install CrossOver, then open it and choose Install a New Application. The search field takes the name of your Windows program, and if CrossOver has a profile for it you’ll see a rating and a link to details on that page. Read the details: they list which versions are known to work and, often, which ones don’t.
Choose a bottle next. A bottle is a self-contained fake Windows environment — its own program files, registry and settings — and you can make as many as you like. Create one with a sensible name rather than accepting the default, because you’ll want to keep a test bottle separate from your main setup if something breaks.
Click Install and let CrossOver run the Windows installer inside the bottle. The program shows up in your Mac’s Applications folder, and from then on it launches like a Mac app. No Windows install, no product key, no restart.
Games need one extra switch. In the bottle’s settings, set the graphics API to D3DMetal or Metal, which maps DirectX calls onto Metal, the Mac’s graphics framework. The default OpenGL route is often slower and less accurate. If a game looks wrong — black screens, missing textures, inverted colours — this setting is the first thing to change.
What CrossOver can’t do is install kernel drivers, run Windows services that need a real kernel, or satisfy anti-cheat. If your program needs any of those, you are in virtual machine territory. It’s also a poor fit for 32-bit software, which is increasingly unsupported at the source.
Choose CrossOver when the program you need is already in its compatibility database, when you play a game or two that work under it, and when you’d rather pay once than maintain your own bottles. The trial covers a realistic evaluation window — test your actual program, not a demo.
Use Wine or Whisky for Simple Compatibility Needs
Whisky is the free, open-source answer to CrossOver, and it has become the first recommendation in Mac gaming communities. Where CrossOver charges and hand-curates profiles, Whisky gives you a clean interface to manage bottles, install profiles, D3DMetal and Windows DLLs yourself. Same underlying technology, different budget and different amount of hand-holding.
Underneath both is Wine, a compatibility layer that translates the Windows API calls a program makes into POSIX calls macOS understands, in real time, as the program runs. Nothing is emulated at the processor level; the translation happens at the API boundary, which is why it can be fast and why it can also fail on any program that pokes at hardware directly.
Setting it up with Whisky
Download Whisky from getwhisky.app, install it, and open it. Whisky can install its own Wine runtime on first launch, so you don’t need to set anything up beforehand. Click Manage Bottles, create a bottle, name it after the program you’re testing, and set the graphics API to Metal or D3DMetal for anything with 3D. Then drop the Windows installer into the bottle and run it.
Where people get stuck is the .dll dialog. When a program quits because a library is missing, Whisky offers to fetch it, and picking the right one matters more than it sounds. Guessing wrong with the wrong DLL can produce a crash that’s harder to diagnose than the original error. Search the program name with the error text, and only install what the game’s own community recommends.
Using Wine directly with Kegworks
Wine’s official macOS packages stopped being maintained, so installing plain Wine from a download is no longer a sensible default. The community moved to Kegworks, which maintains Winery and provides the tooling to build your own Wine prefix. With Homebrew installed, it’s two commands in Terminal:
brew install --cask wine-stable
Winery then gives you a form for the name, Windows version and architecture of each prefix you build, and it can apply tweak scripts such as D3DMetal and the toggles for specific launchers. This is the more powerful path and the more frustrating one. If you only need one program and don’t enjoy troubleshooting, Whisky does the same job with fewer moving parts.
Where compatibility layers fail predictably: anything needing a kernel driver, corporate licence dongles, anti-cheat, 32-bit executables, and programs that call DirectX features D3DMetal hasn’t mapped. When one of those bites, stop debugging and move to a virtual machine. A subscription is cheaper than a weekend.
Choose Whisky or Wine when the program is a game or utility with a light footprint, when you want zero cost, and when you’re comfortable reading a forum thread when something breaks. Choose CrossOver instead when the same program is work you can’t afford to have fail.
Use a Cloud or Remote Windows Computer
Remote access skips the entire problem. The Windows installation, the drivers, the program and its licence already exist on another machine. You’re just sending keystrokes and pixels across the network, which is why this works for software nothing else can run.
Accessing a Windows PC you already own
On the Windows side, Microsoft’s Remote Desktop is built into Windows 10 and 11 Pro and is the highest-quality option for office machines. Windows Home lacks the host feature, so on a home PC you need something else: Chrome Remote Desktop is free, simple and adequate for most non-graphics work, while AnyDesk and TeamViewer handle the cases where you need to cross networks without configuring a router.
On the Mac, Microsoft’s client is called Windows App. Its preview builds have replaced the older Microsoft Remote Desktop app, so search the App Store for the current name rather than assuming. Add your PC by IP address or hostname, save the credentials, and connect.
Latency is the whole story here. On a wired local network, a full desktop feels close to native and colour video works. Over Wi-Fi, or worse over the public internet, it turns into a slideshow with compressed sound. For document and spreadsheet work that’s fine. For video editing or CAD, it isn’t.
Two security points. Never expose Remote Desktop directly to the internet — put it behind a VPN, or use a service designed for it. And enable two-factor authentication on any account you use to reach the machine, because a remote desktop is a remote shell.
Renting a cloud Windows desktop
Windows 365 and similar services give you a hosted Windows desktop that exists whether your machine is on or off. You sign in from a browser or the Windows App, and nothing is installed locally, which makes it a good fit for a locked-down work laptop, a shared machine, or a company that already has a Microsoft 365 agreement you can use.
The trade-offs are bandwidth and subscription cost that continues whether you use it or not. It’s also the cleanest option for anyone whose job requires Windows-specific compliance, since the machine lives inside a data centre rather than on your laptop.
Choose remote or cloud access when the Windows machine already exists and the software is heavy — CAD, video, legacy enterprise systems — or when you need it intermittently from several devices. Choose a local virtual machine when you need speed and offline access.
Common Mistakes
Nearly every failure on this list has a known cause. Here they are in the order you’ll hit them.
Boot Camp Assistant is nowhere to be found
Your Mac has Apple silicon. There is no fix and no workaround; the app does not exist on M-series Macs, which is why Windows 11 on ARM can only be virtualized. Check About This Mac to confirm, then use Parallels or Fusion.
Windows 11 won’t install in Boot Camp
Almost always the missing TPM 2.0. Install Windows 10 instead, which Boot Camp Assistant supports on those Macs natively. If the assistant doesn’t offer Windows 10 either, the Mac predates the requirements and you’ll need a custom ISO or a virtual machine.
The virtual machine is slow
Four causes, in order of likelihood. Memory is over-allocated — close other apps, and remember that macOS itself needs a few GB free. VMware Tools or Parallels Tools isn’t installed, so the display driver is falling back to something slow. The guest is running an unoptimized video mode, which you fix in the VM’s display settings by matching the resolution to your display and enabling 3D acceleration. And the host is thermally throttling, which on a laptop under sustained load is common; give it ventilation, and check what’s eating the CPU with our guide to checking CPU and RAM usage on Windows before you blame the virtual machine itself.
The app crashes under CrossOver or Whisky
Check the compatibility database first, then set the graphics API to Metal or D3DMetal, then try a different bottle with a fresh Windows version. If the program needs a driver, a service or a dongle, no amount of bottle tuning will fix it — move to a virtual machine. That’s not giving up early; it’s the correct routing for software that talks to hardware.
You don’t want to buy the same app twice
This is the most common reason people hesitate, and it’s a fair objection, particularly if you’re moving from Windows. The options: the app may already be installed on a PC you own, in which case remote desktop costs nothing. Many vendors sell a Mac version under the same subscription, so check the vendor’s platform list before assuming. And in some cases the Windows purchase simply becomes a backup licence once the Mac version is active. If a program costs a lot and works in no other way, run a local VM to test it before you commit to anything.
A game won’t launch at all
It’s nearly always the launcher or the anti-cheat. Ubisoft Connect, EA app and Riot’s client ship their own protections and frequently refuse to start outside real Windows, and kernel-level anti-cheat is out of reach for every compatibility layer. Some titles run fine under a virtual machine because that is a complete Windows environment, though the anti-cheat detection is stricter on ARM Windows than on x64. Check the game’s anti-cheat requirements before you set up anything.
Printing and USB devices don’t work
A printer shared from the Mac’s print queue is usually visible inside Windows after you install the vendor’s driver or add it through Windows Settings. Anything with a real USB driver — a hardware key, a scanner, a meter — may not pass through at all, and some security hardware deliberately refuses to run in a virtual machine. Check the device vendor’s documentation for virtualization support before relying on it.
The Mac gets hot and the battery dies fast
Running Windows is a sustained CPU and GPU load, and a MacBook will reflect that in fan noise and battery life. Shut the VM down when you finish rather than suspending it, keep the machine out of a bag while it’s running, and if heat is a recurring issue, the remote desktop route removes the load from your Mac entirely. For ongoing system tuning on the Windows side, our guide to disabling startup programs in Windows 11 makes a noticeable difference to boot time and idle CPU use.
Files end up in the wrong place
Path formats are the culprit. Windows uses backslashes and drive letters, macOS uses forward slashes, and a shared folder is genuinely the same folder on both sides even though the paths look nothing alike. Use the shared folder feature rather than copying files back and forth, and check that OneDrive or iCloud isn’t holding conflicting copies of the same document in sync underneath you.
Two habits make everything smoother. Back up before you repartition a drive with Boot Camp Assistant, and keep a second method in mind from the start — if the compatibility layer route fails, the virtual machine route almost always works, and the reverse is not true.
Frequently Asked Questions
Can Apple silicon Macs run Windows software?
Yes. Apple silicon Macs run Windows 11 ARM inside a virtual machine such as Parallels Desktop, VMware Fusion or UTM, and they run many Windows programs through Whisky or CrossOver. What they cannot do is use Boot Camp, because that partition-and-dual-boot feature exists only on Intel Macs. Windows 11 ARM translates x86 and x64 instructions on the processor, so most ordinary business software performs well, while games with kernel-level anti-cheat and software needing hardware drivers often do not run at all.
Do I need a Windows license to run Windows software on a Mac?
For a virtual machine, yes in practice. You can install and use Windows 11 without entering a product key, and a watermark stays in the corner until you activate, but Microsoft treats unactivated Windows as unlicensed and restricts personalization settings. The key must also cover virtual-machine use. A compatibility layer such as Whisky or CrossOver needs no Windows licence at all, because there is no Windows installation, only translated API calls.
Is it better to use Boot Camp or a virtual machine?
Boot Camp if you own an Intel Mac and want genuine Windows at full native speed, and you can tolerate rebooting to switch. A virtual machine works on any Mac, keeps both systems running at once, and is the only option on Apple silicon. For most people doing daily work, the virtual machine is more convenient. For software that must write to raw disk, such as old antivirus scanners, only Boot Camp on an Intel Mac is a reliable answer.
Can I run Windows games on a Mac with Parallels or VMware?
Some, with limits. A virtual machine is the only route that can run modern Windows games at all on Apple silicon, and titles built for x64 translate to ARM at some cost to frame rate. Games with kernel-level anti-cheat are usually blocked outright, and launchers such as Ubisoft Connect and the EA app frequently refuse to start outside real Windows. Older games and indie titles without either often work well. A compatibility layer such as Whisky or CrossOver runs more of these games, but never one with serious anti-cheat.
How do I share files between macOS and Windows software?
In a virtual machine, use the shared folders setting. Point it at a Mac folder such as Documents, and it appears inside Windows at a mirrored path, so you can drag files both ways. Clipboard sync and drag-and-drop also work once VMware Tools or Parallels Tools is installed. With a compatibility layer, the app simply opens a standard macOS file picker, so there is nothing extra to configure. Under Boot Camp, the Windows partition is separate, so use an external drive or a cloud folder as the exchange point.
Will CrossOver or Wine run every Windows application?
No. Both are translation layers, so anything that depends on a kernel driver, a Windows service, a hardware dongle, or a site licence server will fail. 32-bit executables and corporate enterprise software are the usual casualties, and modern anti-cheat blocks them entirely. They work well for games without anti-cheat, older utilities, and many single-installer business programs. The practical test is cheap: install the app in a bottle, try it, and fall back to a virtual machine if it crashes.
Conclusion: Start With the Least Complicated Option
Check your chip first. Intel Mac means every method on this page is open, including Boot Camp. Apple silicon means a virtual machine is your starting point, and Boot Camp is not a discussion worth having.
Then check what the software needs. One program, no drivers, no services? Try Whisky or CrossOver this week, at zero cost, and find out in an evening. Something with an installer, a licence server, or a corporate IT policy? Go straight to Parallels Desktop or VMware Fusion and budget for a Windows licence too. A machine that already runs the software, at home or in the cloud? Use remote desktop and stop thinking about virtualization.
Most people who get this wrong are trying to force a general method onto a specific program. If you know how to run Windows software on a Mac — which one of the five fits the actual program, the actual Mac and the actual frequency of use — the rest is just setup, and setup goes quickly once the decision is made.
One last check before you buy anything: search the program name plus “Mac” on AlternativeTo and on the vendor’s own site. Some of the old Windows-only names now have native Mac versions under the same subscription, and that’s a faster fix than any of the methods above.