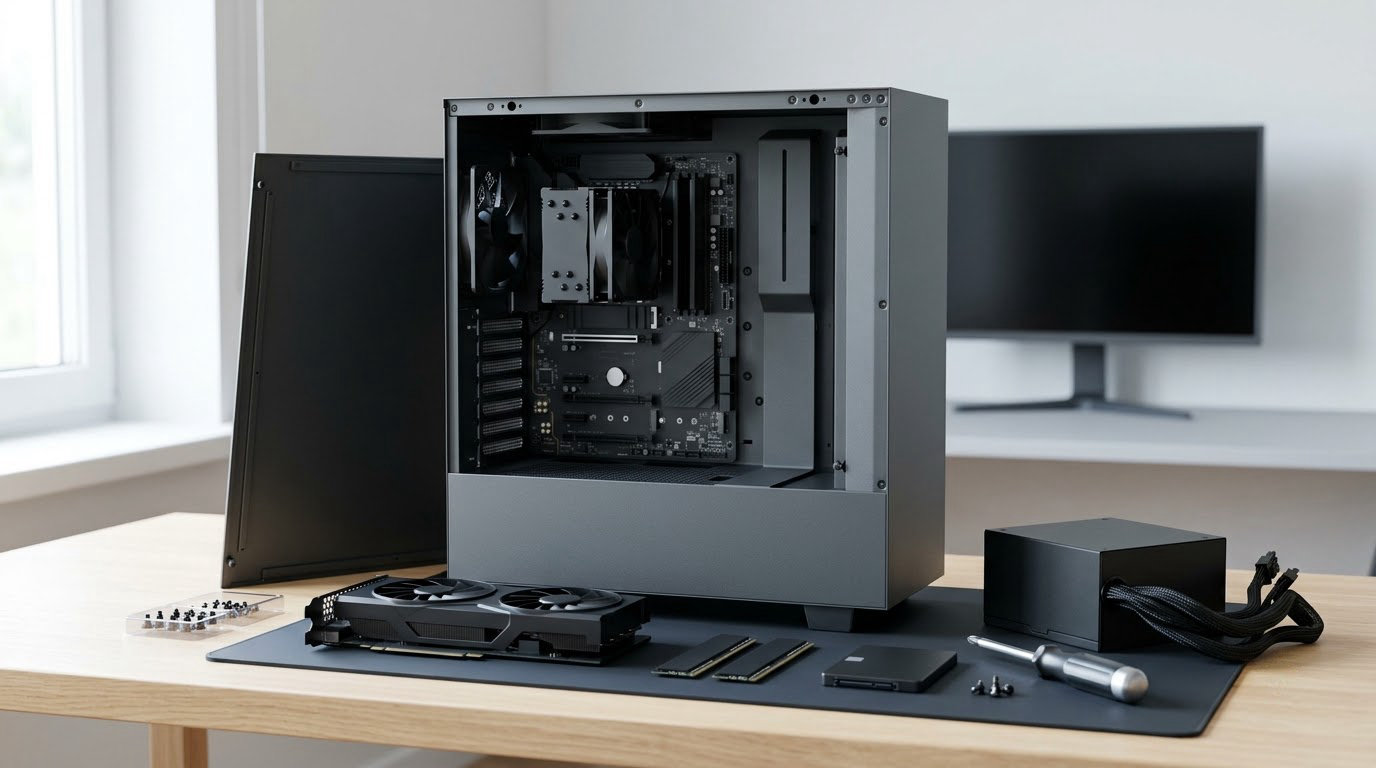
Learning how to build a gaming PC for the first time takes one afternoon of careful work, not a technician’s license. The whole job is plugging correct parts into correct slots, and almost every mistake is reversible. Budget two to four hours for assembly and setup, spread it over a weekend, and start slow.
The reason first-timers get stuck isn’t complexity, it’s sequence. People mount the motherboard before the CPU, or forget the CPU power cable, then panic at a dark screen that was never broken in the first place. This guide fixes the order first, the shopping second, and the troubleshooting third.
Here is the short version of how to build a gaming PC for the first time: unbox everything on a large table, install the CPU and cooler on the bare motherboard, add RAM and storage, run a test outside the case, then mount the board, power supply and graphics card, close it up, set two BIOS options and install Windows.
Table of Contents
- What You Need: How to Build a Gaming PC for the First Time
- Step-by-Step
- Common Mistakes and Fixes
- Frequently Asked Questions
- How hard is it to build a gaming PC for the first time?
- What do I need to build my first gaming PC?
- How long does it take to build a gaming PC for the first time?
- Why won’t my new PC turn on after I built it?
- What are the most common mistakes people make when building a PC?
- Should I build my own PC or buy a prebuilt?
- Conclusion
What You Need: How to Build a Gaming PC for the First Time

You need eight core components, and every one of them has a job that the others depend on. Buy them as a matched set rather than one at a time, because compatibility between the socket, memory generation and case is where first builds go wrong.
- Processor (CPU) — the brain that runs the game and every background process.
- Graphics card (GPU) — the component that actually draws the picture, and the one that matters most for frame rates.
- Motherboard — the board that holds the CPU, memory and cards and lets them talk to each other.
- Memory (RAM) — fast working storage the CPU reads directly; 32GB is a comfortable target now.
- Storage — usually a single M.2 NVMe SSD, which plugs straight into the motherboard.
- Power supply (PSU) — converts wall power and feeds everything, and is the one component you should never cheap out on.
- CPU cooler — a heatsink and fan, unless your CPU bundle includes one.
- Case — the chassis that holds all of it and moves the air.
Add an operating system as a ninth line item. Windows is what most gamers expect, and you’ll need a licence and a USB stick with the installer made before your PC has anywhere to boot from.
| Component | What it does | Where to spend your budget |
|---|---|---|
| GPU | Renders every frame you see | Highest priority for gaming |
| CPU | Runs games, background apps, streaming tools | Second; match it to your resolution |
| PSU | Powers the system and keeps it stable | Never the lowest-cost line in the list |
| Memory | Fast temporary working data | Two sticks of one matched kit |
| Storage | Holds the operating system and your games | 1TB is the practical minimum today |
| Motherboard | Connects and powers everything | Mid-range boards are fine |
| Case | Structure and airflow | Check GPU length before buying |
| CPU cooler | Keeps the processor from throttling | The stock cooler is often enough |
Tools and workspace
You need three tools and a table. A Phillips #2 screwdriver covers nearly every screw on a modern PC, a Phillips #0 or a magnetic bit set handles the smaller M.2 and case screws, and a small magnetic parts tray keeps screws organised. An anti-static wrist strap clipped to a metal case edge is cheap insurance.
The workspace matters more than people expect. Clear a table at least twice the size of your case, work on a hard floor rather than carpet, keep drinks in another room, and never build on a bed or a lap. Static and gravity cause more ruined first builds than any technical error.
Unbox everything before you start and lay the parts out in groups. Keep the motherboard in its anti-static bag until you’re ready, because a bag is not a formality — bare PCB is exactly what you want to avoid resting on a table. Put the screws for each step in separate compartments of the tray so you know at a glance which ones you already used.
Photograph your work at three points: the bare board with the CPU and cooler fitted, the motherboard mounted in the case, and the finished cable routing. The photos cost nothing and they turn a vague “it doesn’t boot” question into something a stranger can actually answer.
One more piece of prep pays for itself: make your Windows installer USB stick on another computer before the build. The process uses Microsoft’s own Media Creation Tool, takes about fifteen minutes, and it removes the most frustrating half hour of a first setup.
Compatibility checklist before you buy anything
Run through this list once, in order, and you’ll avoid the error that ends most builds before they start.
- Socket and CPU — the processor model must match the motherboard socket exactly, such as AM5 or an LGA board. The packaging states both.
- Memory generation — DDR4 and DDR5 modules look similar and do not fit the same slots or run on the same boards. Check the motherboard spec.
- Form factor — a MicroATX board fits a full ATX case, but not the other way around. Buying a smaller board first and a larger case second is the safe order.
- PSU wattage — add the recommended power for your GPU and CPU, then leave headroom. Modular and 80 Plus Gold units are common and easy to route.
- GPU length — modern cards are long and thick. Compare the card’s length in millimetres against the case’s maximum GPU clearance.
- Cooler height — tower air coolers list a maximum supported height for each case, and the number is often tighter than expected.
- Storage type — M.2 NVMe slots differ from SATA ports. Newer boards often have two M.2 slots, one fed by the CPU and one by the chipset, and both run at full speed.
- BIOS Flashback — a nice safety net if your CPU can’t produce a display on its own, useful for a first build where the processor has no integrated graphics.
Step-by-Step
Is it hard to build a gaming PC for the first time?
Harder than the videos suggest, mostly because those videos edit out the slow parts. In practice the mechanical work is a couple of dozen connectors, and each one has a shape that only fits one way. The real skill is patience: reading the manual for your specific board rather than guessing from a generic video.
First-time builders consistently report finishing in two to four hours including the operating system, which matches what we see. The breakdown below assumes one person working without interruptions, and it adds slack on the steps that make beginners hesitate.
| Stage | Typical time |
|---|---|
| Unboxing, sorting parts, reading the board manual | 20 to 30 minutes |
| CPU, cooler, memory and M.2 on the bare board | 30 to 45 minutes |
| Test run outside the case | 10 minutes |
| Power supply, motherboard, graphics card, cabling | 45 to 60 minutes |
| First boot and BIOS settings | 15 minutes |
| Windows and drivers | 45 to 90 minutes |
Plan the Parts and Budget
Spend where the games feel it, which is the graphics card for almost every setup. A mid-range CPU paired with a capable GPU gives smooth 1080p or 1440p play, while a high-end CPU with a modest card can leave you watching a simple game crawl. Match the pair to the resolution of your monitor.
Then allocate the rest deliberately. A quality power supply with 80 Plus Gold efficiency and a modular cable set costs more up front and saves you the loose cable bundle later. Two matched memory sticks in the correct slots beat four unmatched ones, and the stick from your parts order is always a matched kit.
Spend nothing on decoration during a first build. A tempered glass side panel, RGB fans and a glass top add nothing to frame rate, and the glass is the part most likely to get cracked while you’re working. Buy the plain case, keep the money, and upgrade the look once the machine has proved it stays on.
Storage is where a first build quietly underperforms. A single NVMe drive of 1TB or more keeps load times short and leaves room for the library games you already own. Add a secondary drive later rather than splitting the OS across two small ones, which is a common source of slow boot times.
Before you buy anything, post the list for free validation. Subreddits like r/buildapc and r/buildmeapc will check compatibility line by line, and a parts list post with your socket, memory type, case and total budget gets answers within hours. That one step catches more problems than any checklist in this guide.
Do not forget the monitor and other peripherals. A PC with an integrated-graphics-only CPU sends no picture without a graphics card, so check whether your processor has built-in graphics before deciding you need one. A gaming PC that boots into a desk with no signal is almost always a missing or badly seated GPU.
Prepare the Case and Install the CPU
Prep: case, I/O shield, standoffs, Phillips #2 screwdriver, parts tray.
Strip the case panels, set them aside on a soft surface, and install the I/O shield from inside the case so its ports line up with the openings at the back. Some cases ship with the shield already fitted, so check before forcing anything.
Find the motherboard standoffs already installed for your board size. They must line up with every mounting hole. A board resting on a standoff that isn’t there, or hovering over a spare one, causes short circuits that stop a PC from booting at all.
Now build the core on the bare motherboard, on the box or a table, with the CPU, cooler, memory and M.2 drive. This position gives you room to see every socket and lets you test the system before it goes anywhere near the case.
Open the CPU socket, lift the retention arm, drop the processor in with the gold triangle aligned to the triangle marked on the board, and lower the arm. On LGA boards the socket has flat contacts and the chip has flat pads; on PGA boards the socket has pins and the chip has holes. Pressing a PGA chip straight down with force is the one truly unrecoverable beginner error, so support the socket with a finger while you close the arm.
Apply a small pea-sized amount of thermal paste if the cooler doesn’t come with paste pre-applied, then mount the cooler and tighten it evenly in a cross pattern. Paste is meant to fill microscopic gaps; a big blob can insulate the chip and cause thermal throttling under load.
Install the Motherboard, Memory, and Storage
Prep: assembled motherboard, standoffs, case screws, SATA data cables.
Slide the I/O shield into place, hold the board at an angle against the standoffs, and secure it with screws through each mounting hole. Tighten them firmly but not aggressively; the board is heavy and it does not flex.
Pop in the memory next, while the board is still easy to reach. Press the retaining clips open, align the notch in the module with the notch in the slot, and push until both clips snap shut with a click. Fill the slots your manual lists second, usually slots 2 and 4 from the CPU, so dual-channel mode works.
Next comes storage. An M.2 NVMe drive slides into its socket at roughly a 25-degree angle, gets pressed flat, and is held down by a small screw or clip. If the drive came with a thermal pad, peel the film off before you close the heatsink. Connect the CPU power cable to the 8-pin connector along the top edge of the board, and the large 24-pin connector to the motherboard’s right edge, both until the latch clicks.
Install the Graphics Card, Power Supply, and Cables

Prep: graphics card, power supply, PCIe power cables, front-panel and fan leads.
Mount the power supply at the top or bottom of the case as designed, with the fan facing the case’s bottom vent if it takes air from inside, or the rear vent if the PSU blows out the back. Fix it with the four screws at the back, then connect the motherboard’s 24-pin and 8-pin CPU cables from the PSU side. Route them behind the motherboard tray, never across the board’s back, where they can press components flat.
Now seat the graphics card. Unscrew the expansion slot covers at the rear, align the card with the PCIe x16 slot — the long slot nearest the CPU — and push until the retaining clip flips up at both ends. If the card has two or three 8-pin power sockets, connect them all from the PSU; adapters exist for older supplies, but use the native cables whenever you have them.
The front panel leads are the fiddly part. The case’s power switch, reset button, power LED and hard-drive LED plug into a row of tiny two-pin headers on the board, and the manual tells you the exact position for each. Check the silkscreen text, not the cable colours alone. Then connect the case fans to the fan headers, which are usually a group of four pins, and plug the case’s USB and audio leads into the matching headers along the board’s edge.
Do the cable management last, once everything works. Bundle unused leads behind the tray, keep bundles away from the case fans, and leave enough slack that nothing touches a blade.
Close the Case and Test the PC
Prep: side panel, monitor, keyboard, USB stick with the Windows installer.
Before you power on, walk the machine. Confirm the CPU cooler is bolted down, the 24-pin and 8-pin CPU connectors are latched, the memory clips are shut, the GPU is clipped into the PCIe slot, and no stray screw is sitting on the board. Then install the side panel and press the power button.
A working system fans up, shows a logo with a short beep, and stops on one or two memory sticks. If you see nothing, work through the troubleshooting table below before disassembling anything.
Once you reach the BIOS, make two changes and leave the rest alone. Enable the XMP or EXPO memory profile, which is what makes your RAM run at its advertised speed instead of a slow default. Then set the boot order to your USB stick or SSD so the machine looks for the right drive first. Save and exit, and the machine will boot from your installer.
One warning about the memory profile: if the machine won’t POST after you enable it, that profile isn’t stable on your board, and you switch it back off in BIOS rather than trying to fix it in Windows. That’s not a broken part. Keep one stick in the primary slot for that call, and try the profile again once you have more memory in both channels.
Your first login brings a few settings worth changing straight away. Turn on Game Mode in Windows so background updates don’t compete with your frame rate, check that the display is running at your monitor’s full refresh rate rather than a default 60Hz, and confirm your storage shows up in File Explorer. If you’re on a laptop-style drive or an old monitor cable, a low refresh rate is easy to mistake for weak hardware.
Install the operating system, then the drivers. Use the motherboard manufacturer’s chipset and LAN drivers first, the GPU driver’s clean install second, and let Windows Update handle the rest. Add your launchers and game clients, and run one demanding game for half an hour before you consider the build finished, watching the frame rate and temperatures while it plays.
That last half hour is the real quality check. Compare the frame rate against what the game’s recommended specs suggest, and if it feels low, check the frame rate counter the GPU driver includes before blaming the hardware. A capped frame rate from a driver setting, a game running at 1080p on a 1440p monitor, or a background streaming app are the usual explanations.
Common Mistakes
Most first-build failures come down to six mistakes, and all six are cheap to prevent.
Buying incompatible parts. Socket, memory generation and form factor must agree. Check all three against the retailer’s specification pages before you pay.
A CPU that isn’t seated. The retention arm should close with firm resistance, and the socket’s two plastic tabs should sit under the CPU’s edges. An open arm or a board sitting proud of a latch means it isn’t locked.
Missing CPU power. The top 8-pin connector powers the processor alone, and without it the system can sit dead with no fans. It’s one of the most common first-boot failures.
Reversed front-panel connectors. The two front-panel pins are the fiddliest things in the case, and guessing at them can hold the power button hostage. The board manual shows the position precisely.
Loose cable management. Unused leads shoved behind the drive cages block airflow and raise temperatures, and stray screws on the board cause short circuits. Tie the bundles and clear the floor of the case.
Skipping software setup. A system that boots into a basic display but stutters in games is usually running generic drivers instead of the real GPU driver.
Common Mistakes and Fixes
Run this checklist every time before you press power. It takes thirty seconds and it catches most first-boot failures.
- CPU retention arm fully closed and tabs engaged
- Both the 24-pin and the 8-pin CPU power connectors latched
- At least one memory module in a slot, clips shut
- Graphics card clicked into the PCIe slot, power cables connected
- No loose screws resting on the motherboard or in the case floor
- Monitor plugged into the graphics card, not the motherboard, when a separate GPU is installed
If it still doesn’t start, match the symptom to the fix below rather than taking everything apart.
| Symptom | Likely cause | Fix |
|---|---|---|
| Nothing at all, no fans | Power supply switch off, or no wall connection | Flip the PSU switch and reseat the power cable at both ends |
| No power button response | Front-panel pins in the wrong header or reversed | Follow the board manual diagram for the power switch pins |
| Fans spin, no display | Graphics card not seated, or display plugged into the board | Reseat the card, move the video cable to the GPU outputs |
| No display, CPU has no integrated graphics and no GPU is installed | Missing dedicated graphics | Install a GPU, or flash BIOS from a USB port with BIOS Flashback |
| Black screen for a second then off | RAM not seated, or a failed memory profile | Reseat one stick in the primary slot, leave XMP off for the first boot |
| Runs, but games stutter or crash | Generic drivers, or unstable memory profile | Install the GPU driver properly, then re-enable XMP or EXPO |
| Board sits on a standoff with no hole, or a hole without a standoff | Mismatched standoffs shorting the board | Move the board so it rests only on installed standoffs |
| CPU runs hot and games slow down | Cooler not tightened, or thermal paste skipped | Retighten the cooler in a cross pattern and check the paste |
Test outside the case early and everything gets simpler. Mount the motherboard and power supply on the desk, plug the CPU power and 24-pin cables into the board, and leave the GPU out. If it reaches the BIOS, you know the processor, board, memory and PSU all work, and any later problem is case wiring, storage or the graphics card. That’s a five-minute check that saves an hour of guessing, and it’s the advice r/PcBuildHelp repeats more than any other.
When you’re still stuck, photograph the inside of the case and post it with your board model. Be specific about what happens, not just that it doesn’t work — whether fans spin, whether lights come on, and whether any beep code appears. Volunteers can only help with what they can see.
Frequently Asked Questions
How hard is it to build a gaming PC for the first time?
Harder than it looks in a sped-up video, easier than it feels in practice. The mechanical work is a couple of dozen connectors, each of which fits only one way. What catches beginners is sequence rather than skill: mounting the board before the CPU or skipping the 8-pin CPU cable. Give yourself a weekend, work from the board manual, and allow two to four hours including Windows.
What do I need to build my first gaming PC?
Eight core parts plus an operating system: CPU, graphics card, motherboard, memory, storage, power supply, CPU cooler and case. Add a monitor, keyboard and mouse if you don’t own them already. You also need a Phillips #2 screwdriver, a small magnetic parts tray, a clear table, and a USB stick with the Windows installer made before you begin.
How long does it take to build a gaming PC for the first time?
Two to four hours for most first-time builders, including the operating system and drivers. Assembly itself takes an hour to ninety minutes if you read the manual as you go. Windows installation and updates add the largest block of unattended time. Add an extra thirty minutes if this is your first time using a screwdriver, which is a fair thing to admit.
Why won’t my new PC turn on after I built it?
Start with power: check the switch on the power supply, the wall connection, and that the 24-pin and 8-pin CPU connectors are latched. Missing CPU power is the single most common cause. Next check the front-panel pins against the board manual, and confirm the monitor is plugged into the graphics card rather than the motherboard. Then reseat the memory and try one stick in the primary slot.
What are the most common mistakes people make when building a PC?
The big ones are buying incompatible parts, so verify socket, memory generation and form factor first. After that come an unseated CPU, a missing 8-pin CPU power cable, reversed front-panel pins, stray screws shorting the board, and booting with generic drivers. Mismatched standoffs under the motherboard also cause immediate no-boot failures. Every one of these has a fix that takes minutes.
Should I build my own PC or buy a prebuilt?
Building wins when you want specific parts, room to upgrade later, and control over what goes inside the case. Prebuilts win on convenience and on warranty service, and they’re often better value right after a new platform launches because component prices are high. Check a prebuilt’s PSU and memory before buying; those are where budget builds cut corners. For a first-timer on a budget, a discounted prebuilt is a reasonable choice.
Conclusion
The safest order of operations is short: build the core on the bare motherboard, test it outside the case, then move it into the chassis. That sequence means a wiring mistake never costs you a full disassembly, and it’s why experienced builders never skip the test run.
Before anything else, verify compatibility. Socket, memory generation, form factor, PSU wattage, GPU length and cooler height take ten minutes to check and save a return. Prepare the workspace, install the CPU and memory with care, latch every power connector firmly, and test the system before you route a single cable.
Everything after the first successful boot is setup: enable XMP or EXPO, install the operating system, add the chipset and graphics drivers, then run a demanding game and watch the frame rate. That’s the whole job, and it’s a satisfying one.