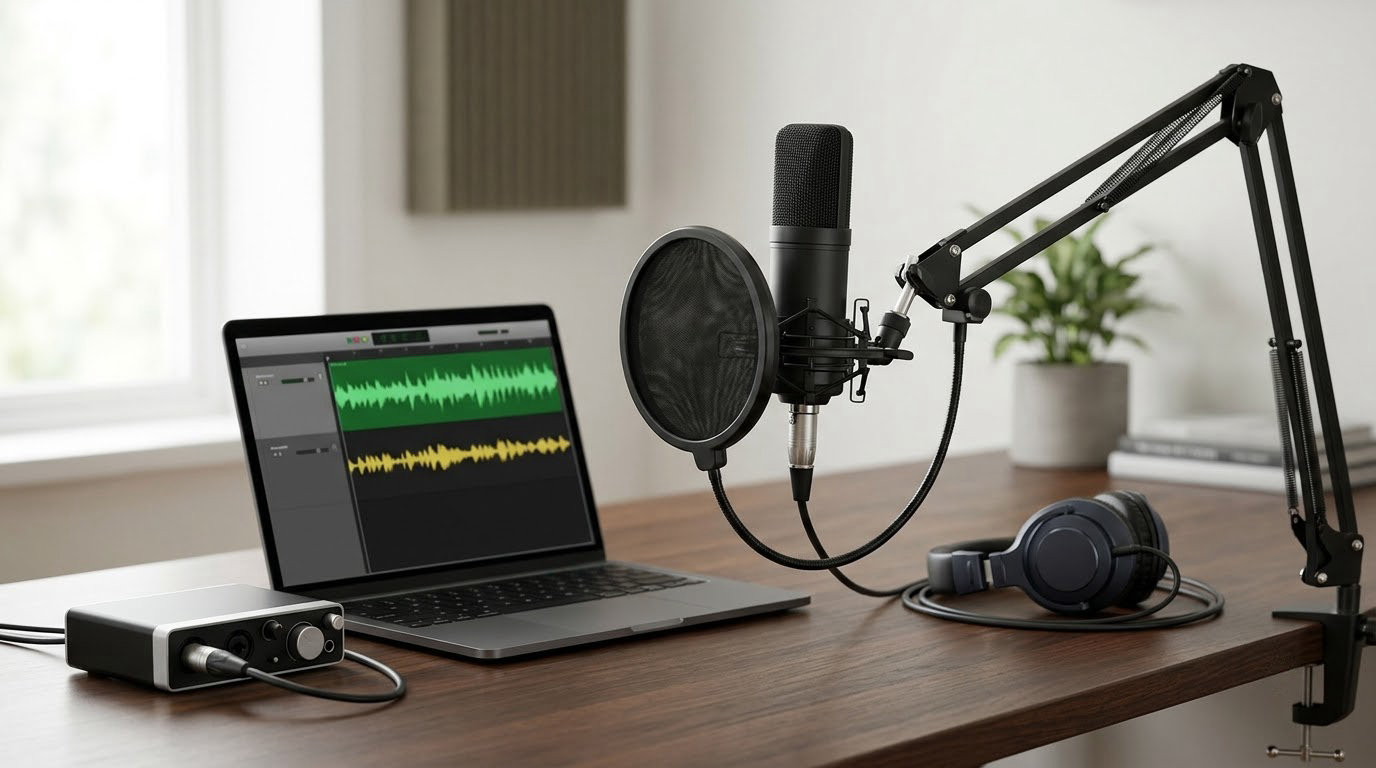
The honest way to pick a desk mic for clear audio is to run seven tests you can finish in one afternoon: name the recording task, check what your computer can accept, match the capsule to your voice, measure your room noise, set gain properly, record a repeatable sample, and compare. Spec sheets tell you less than most people expect. What separates a clean recording from a muddy one is usually capsule type, placement and room noise, not the model name.
This guide takes about an hour of reading plus twenty minutes of actual testing at your desk. No audio engineering background needed.
Table of Contents
- What You Need
- Step-by-Step: Seven Tests That Decide It
- Frequently Asked Questions
- Is a USB desk microphone good enough for clear voice recordings?
- Should I buy a USB or XLR microphone for home recording?
- How do I choose a microphone that matches my deep or bright voice?
- Do I need a pop filter if my desk microphone has a built-in pop filter?
- Can I test a desk microphone before buying it?
- Conclusion
What You Need

You need five things before comparing anything, and none of them cost money. If you are starting from scratch, work through this list in order so each test rules something out.
Your recording device. Know whether you will plug into a laptop, a desktop, a phone or a tablet. That single fact eliminates most options before you look at a single spec.
A rough read on your connection options. USB microphones plug straight into a computer and work immediately. XLR microphones need a separate box called an audio interface, which converts the analog signal into something the computer understands. Wireless microphones transmit to a receiver, either over a 2.4 GHz band or over Bluetooth, and they let you move away from the desk. Headset microphones use a 3.5 mm jack and are the least accurate of the four.
A sense of your room. Sit at your normal desk position for a full minute and just listen. A quiet home office sounds completely different from a room facing a street, and that difference decides whether you want a sensitive capsule or a forgiving one.
A listening setup. You cannot judge a desk mic through laptop speakers. Wired headphones with a closed back are the minimum, and they are the single biggest upgrade to your evaluation process.
A short spoken test. Decide on one paragraph you will read identically for every microphone you test. Twenty to thirty seconds is plenty.
Step-by-Step: Seven Tests That Decide It
Run these in sequence. Each test narrows the field, and each one has a clear success signal, so you know whether it passed before moving to the next. The tests are ordered because later ones only make sense once the earlier ones are settled.
Test the Setup: How to Pick a Desk Mic for Clear Audio

The fairest comparison starts before you unbox anything: build one repeatable recording and reuse it for every mic. Set your desk microphone at a fixed distance, aim it at the same spot on your chest, and speak at the same volume into the same paragraph each time.
Distance is the variable people get wrong. Sit back in your normal chair and measure, because that is where you will actually be. Most people find their face sits 12 to 18 inches from a laptop screen, and that is far enough to record the room along with your voice.
For a desk mic, aim for 6 to 12 inches between your mouth and the capsule, angled slightly off-axis rather than pointed straight up your nose. If you succeed at holding a consistent distance, speaking at a consistent volume and reading the same words, the test passed and you now have a baseline to compare against.
Keep the sample short. Twenty to thirty seconds gives you enough to hear a hum, a plosive or a hiss, and short enough that you will actually listen to every take instead of skipping the boring ones.
Start With the Recording Task
The task you are recording decides everything else: connection type, features and pickup pattern. A microphone that is perfect for narration can be a poor choice for a call where three people talk over each other, because the two situations have opposite requirements.
Video calls and meetings need one voice, picked up cleanly, with a mute button you can reach without looking. Streaming and gaming need the same voice pickup plus a headphone jack for game audio and a mute that works mid-game. Voice-over and podcasting reward a quiet room and reward getting closer to the mic. Music needs a neutral, honest capsule that does not add colour.
Five microphone types cover almost every desk job, and the differences come down to what the capsule does rather than the badge on the front.
- Dynamic. A moving-coil element that tolerates loud sources and rejects distant sound. Best for noisy rooms, untreated spaces and close-mic speaking. Needs more gain and a closer position than a condenser.
- Condenser. A capacitor element that is very sensitive and detailed across the frequency range. Best for quiet, treated rooms, voice-over and vocals. Picks up room noise, fans, traffic and reflections easily.
- USB. An analog-to-digital converter and preamp built into one desk unit. Best for plug-and-play computer recording. You cannot swap the preamp or the capsule later.
- XLR. An analog output that runs to an audio interface or mixer. Best for recording you intend to grow into. Needs an interface, cables and setup time.
- Wireless. Sends audio to a receiver or straight to a device. Best for moving around, uncluttered desks and multi-speaker calls. Costs you battery life and adds latency and compression artifacts.
If you succeed here, you know which of those five matter. Everything after this narrows within that shortlist.
Choose the Connection Your Computer Supports
Choose the connection your computer already supports, because that is where the setup friction lives. USB is the shortest path for most people. XLR buys you flexibility and better preamps, at the cost of extra hardware. Wireless buys you freedom of movement and adds a receiver to keep track of.
- USB. Needs nothing beyond the cable. Best for laptop or desktop recording with no extra gear. Fixed preamp quality, so check it works with your OS before buying.
- XLR. Needs an audio interface, an XLR cable and often 48V phantom power. Best for recording that will outgrow a desk setup. More parts to configure and more ways to end up with a quiet hum.
- Wireless 2.4 GHz. Needs a receiver or dongle. Best for standing up, moving around and casual streaming. Latency through monitoring and battery management are the catch.
- Bluetooth. Usually needs nothing. Best for quick calls on a phone. Compressed audio, and that is the ceiling for clarity.
- 3.5 mm. Needs an adapter on modern laptops. Fine as a backup and for headset compatibility, but it offers no gain control, no monitoring and poor noise rejection.
Two compatibility checks matter more than any spec. Confirm your operating system recognises the microphone without drivers, because a desk mic that Windows 11 or current macOS treats as a generic two-input device will force you into a mix-minus setup you did not ask for. Then confirm the headphone jack, if there is one, is a real output rather than a passthrough that routes your voice back into the room.
You have passed this test when the microphone appears in your system’s sound settings and your voice comes in at a usable level without any extra hardware.
Match the Microphone to Your Voice
Voice and microphone tone interact in ways you can hear in the first ten seconds of a test recording. A deep voice has plenty of low energy, so a bright or thin-sounding microphone tends to thin it out further. A bright or sibilant voice often pairs better with a slightly darker capsule, because the microphone is not adding energy in the range where your voice already has plenty.
Resonant voices sit somewhere in the middle and usually sound best with a dynamic capsule, which rolls off extended high frequencies gently rather than cutting them. Thin voices benefit from the low-mid warmth a dynamic naturally provides.
Two other voice-specific effects are worth naming. Proximity effect is the bass boost you get when a dynamic sits very close, which can sound rich on a deep voice and muddy on the same voice pushed too close. Sibilance is the sharp hiss on s and t sounds; many desk microphones include a low-cut filter around 80 Hz that helps with desk rumble, and a separate high shelf you can pull down if sibilance is your problem.
Nobody is automatically best for every speaker, and reviewers who claim a single model flatters all voices are describing their own voice. The right mic is the one whose tone makes your normal speaking volume sound comfortable without correction. You succeed when you listen back and do not reach for an EQ before finishing the paragraph.
Account for Desk and Room Noise
Test where you will actually sit, because noise problems are positional. Put your mouth on the sentence you would say in a meeting and listen for what the room adds: keyboard clatter, a CPU fan, traffic, a radiator, or the low rumble that comes up through a hollow desk when you tap it.
Polar pattern is how you decide what to reject. Cardioid picks up mostly from the front and rejects the sides and rear, which makes it the default choice for a desk mic. Supercardioid narrows the front lobe and rejects more from behind, at the cost of some pickup from the sides. Omnidirectional picks up equally in every direction, which sounds natural for a roundtable and terrible in a room with traffic. Figure-8, also called bidirectional, picks up front and back while rejecting the sides, which suits two people facing each other.
The 3:1 rule explains why distance matters more than people expect: for every unit of distance between you and a noise source, the noise should be at least three times further away. So if you sit 12 inches from your desk mic, your mouth needs to be at least 36 inches from your keyboard, your monitor speakers and anything else that makes noise. Move closer to the mic and push the noise sources back, and the ratio does the work that expensive hardware cannot.
Two room fixes cost nothing and beat most purchases. Close your laptop lid so the computer’s own microphone is not picking up the same room, and move monitor speakers away from your mic or use headphones instead. Speaker bleed that others hear as echo is almost always the microphone, but the cause is the speaker position.
A quick way to hear the room on its own: record twenty seconds of silence, then play it back loudly. That clip is your room tone and your noise floor. Note whether it is broadband hiss, a steady hum at a specific frequency, or a rumble that swells when you speak. You have passed when you know which of those you are dealing with before you compare any microphone.
Set Gain and Monitoring Correctly
Set gain so your loudest normal speaking moment peaks near -12 dB on the input meter. That leaves roughly 12 dB of headroom, so a laugh or a raised question does not clip. Gain is the preamp’s volume control: turn it up and quiet room noise gets amplified along with your voice, which is why an over-gained recording sounds hissy and thin.
Take the gain down until the meter stops touching the top, then bring it back up slowly until peaks hit about -12 dB. If your software shows a clipping indicator, you are too hot. In Windows, check Settings, then System, then Sound, then Input to pick the microphone and open Device properties to see the level meter. In current macOS, open System Settings, then Sound, then Input.
Headphone monitoring lets you hear yourself while recording, which is how you catch distance problems, clipping and room noise before they reach the recording. A mic with zero-latency monitoring routes your voice straight to the headphones with no delay, so you can speak normally instead of performing an exaggerated broadcast voice to compensate for echo. Test monitoring for bleed: with headphones on, speak and listen for your voice leaking into the recording when you should not.
The mute button matters more than spec sheets admit. A physical or top-mounted button you can find by touch saves you from the software mute that lives in a menu you have to hunt down mid-call. Confirm the mute actually mutes, including on platforms that read the hardware control.
You have passed when your peaks sit near -12 dB, no clipping indicator lights, and you can hear yourself clearly in headphones without echo.
Compare the Test Recordings
Compare takes side by side with the same paragraph, same volume and same distance. Listen for seven things, in this order.
Voice clarity. Can you follow every word without straining? Listen at low volume too, because thin recordings fall apart quietly.
Background rejection. Play the silence between sentences. Room noise should drop noticeably when you stop speaking rather than sitting at a constant level.
Sibilance. Listen for hard s and t sounds. Sharp, spitty sibilance is the most common complaint about bright microphones, and it is fixable with EQ but nicer to avoid.
Plosives. The bursts of air on p and b sounds. A pop filter in front of the capsule solves this for very little money, and no microphone solves it entirely on its own.
Room tone and reverb. Play the recording back at half volume. Reverb shows up as a tail on the end of words, and it is the single biggest reason a cheap microphone sounds cheap.
Handling noise. Tap the desk near the base while recording. A shock mount or a desk stand with some weight reduces what reaches the capsule, and a boom arm mounted to the desk edge transfers far less than a weighted base sitting on the same surface.
Monitoring comfort. Did you want to speak at a normal volume? If you spent the whole take leaning in, that is a positioning problem and you will resent the microphone during a long call.
A cheaper microphone is the better value when its test recording needs less correction to reach the same clarity. That is the whole comparison, and it is more reliable than any ranking. People regularly report that a mid-range USB dynamic outperforms a pricier condenser in the same room, because the dynamic’s noise floor sits below the room rather than above it.
Common Mistakes
Buying by popularity. Rankings reward sales volume, not fit for your room. Fix: run the seven tests before choosing anything.
Comparing microphones at different distances. A mic held in your hand at four inches will beat a properly placed one every time. Fix: measure 6 to 12 inches and mark it on your desk with tape.
Ignoring room acoustics. Software cannot separate your voice from a noisy room. Fix: close the laptop, silence the fan if you safely can, move the monitor speakers, and re-test the room tone before blaming the microphone.
Setting gain too high. Everything above your voice gets amplified with it. Fix: peak near -12 dB and leave headroom.
Leaving the microphone too far away. Distance costs you the 3:1 ratio and hands your room back to you. Fix: get to 6 to 12 inches, slightly off-axis.
Expecting software to rescue a bad recording. Noise suppression reduces steady hum and can thin out a voice when pushed hard. Fix: fix the room and the levels first, then use processing as a finishing touch.
Leaving the built-in laptop microphone as the default. Plenty of people plug in a new microphone and never change the input setting. Fix: set the new microphone as the default input in your system sound settings and confirm it by recording ten seconds and playing it back.
Frequently Asked Questions
Is a USB desk microphone good enough for clear voice recordings?
Yes, for calls, streaming, podcasting and voice-over at a home desk, a USB microphone is the shortest path to clear audio. Built-in converters now handle 24-bit at 44.1 or 48 kHz sample rates, which covers every practical use. Choose a dynamic capsule if your room has noise, a condenser if it is genuinely quiet, and set gain so peaks land near -12 dB. Add a pop filter and use headphones, and the difference from a studio setup is mostly polish.
Should I buy a USB or XLR microphone for home recording?
Buy USB if you want to record this week with one cable and no setup. Buy XLR if you already own an audio interface, expect to grow into a home studio, or want to swap microphones later without replacing the front end. XLR condensers need 48V phantom power from the interface, and dynamic mics do not. The sound difference on a well-matched pair is small; the flexibility difference is not.
How do I choose a microphone that matches my deep or bright voice?
Test by reading your usual paragraph at normal volume and listening for comfort rather than excitement. Deep voices usually pair well with a dynamic capsule, which tames the extended high frequencies. Bright or sibilant voices often sound better with a slightly darker capsule. Keep in mind that proximity effect boosts bass when a dynamic sits close, so a deep voice may need less proximity than a bright one to sound full.
Do I need a pop filter if my desk microphone has a built-in pop filter?
A built-in filter handles most plosive bursts at normal speaking volume, so it covers a lot of cases. A separate external pop filter placed 2 to 3 inches in front of the capsule is cheap and catches what the built-in one misses, especially if you speak close or at full volume. If you do not buy one, aim the microphone slightly off-axis so bursts miss the capsule entirely. Test the close p sound and decide from that recording.
Can I test a desk microphone before buying it?
Yes, and you should. Retailers that allow returns are effectively a free test period, as are electronics stores that demo units through a phone or laptop. Some creator spaces and libraries let you record on shared equipment. If none of that is available, watch a demonstration recorded in a comparable untreated room rather than a treated studio, and pay attention to how much room noise sits under the voice. Return windows are the most reliable test there is.
Conclusion
How to pick a desk mic for clear audio comes down to matching capsule, pattern and connection to your room and your voice, then proving it with a repeatable test recording rather than trusting a spec sheet.
Do this first: pick two shortlisted microphones, record the same thirty-second paragraph with each one at 6 to 12 inches in your actual desk position, listen back through wired headphones, and choose the one that needs the least correction. If both need work in the same way, that is your room telling you something, not the microphones.