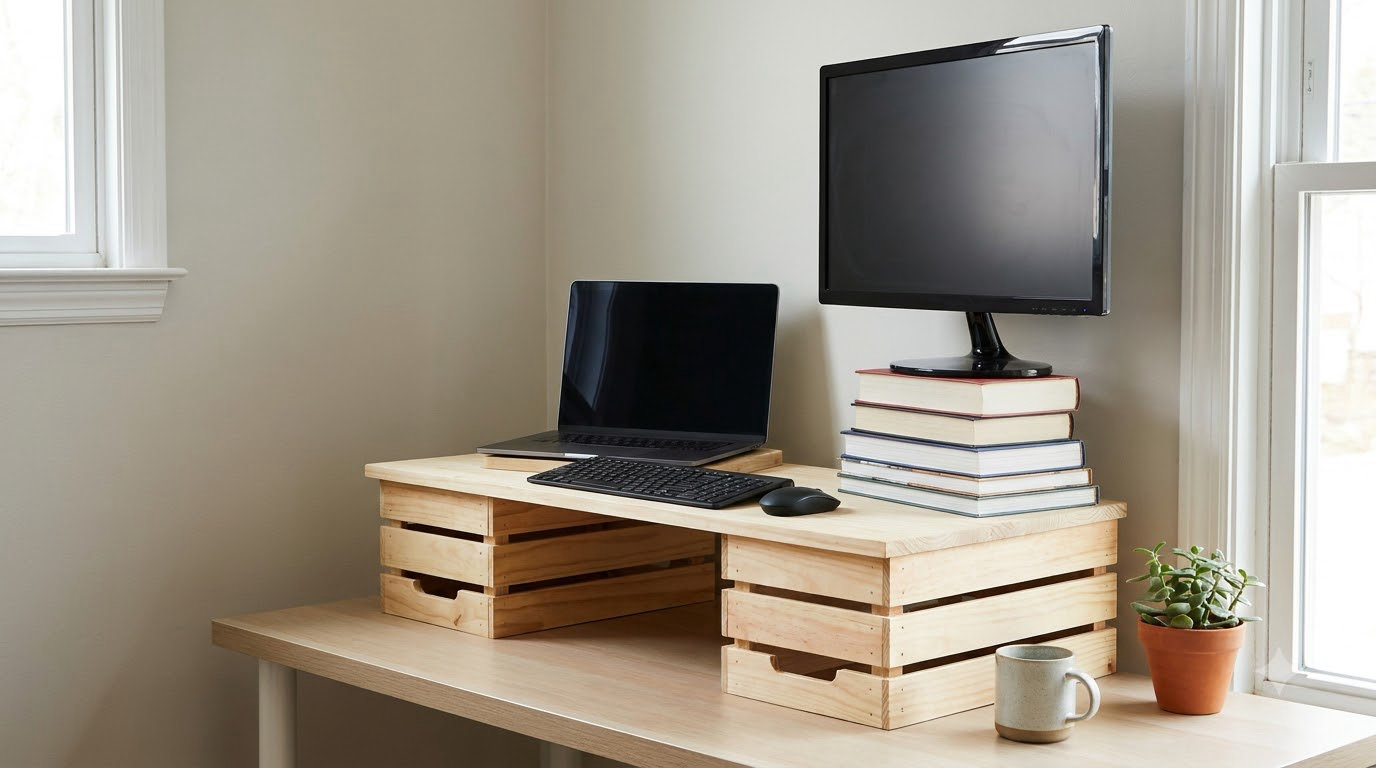
Learning how to make a DIY standing desk cheaply is mostly a matter of deciding how permanent you want it to be. You can stack something solid under the desk you already own for free, build a fixed base from a sawhorse and an old door, or buy only the moving frame and put a cheap top on it. The last option costs more but is the only one that changes height on demand.
Below is the version I keep coming back to: measure first, buy the frame second, and let your actual elbow height pick the top. A desk that wobbles teaches you nothing, and a desk at the wrong height gives you neck and wrist pain instead of relief.
Table of Contents
- What You Need
- Step-by-Step: How to Make a DIY Standing Desk Cheaply
- Step 1: Choose the Cheapest Route to Make a DIY Standing Desk Cheaply
- Step 2: Measure Your Space and Set a Comfortable Working Height
- Step 3: Source an Inexpensive Frame and Top Without Sacrificing Stability
- Step 4: Assemble the Frame and Attach the Desktop
- Step 5: Add Bracing, Anti-Slip Feet, and Cable Management
- Step 6: Test Stability at Sitting and Standing Heights
- Step 7: Fine-Tune the Desk for Comfortable Daily Use
- Common Mistakes
- Frequently Asked Questions
- Conclusion
What You Need

What you need depends entirely on which route you take, and the difference between the cheapest and the most comfortable build is bigger than most people expect. Here is the honest comparison of the four routes, cheapest first.
| Build route | Cost | Tools needed | Build time | Height changes | Stability |
|---|---|---|---|---|---|
| Stack risers under an existing desk | Free to very low | None, maybe a tape measure | Two minutes per switch | Only between fixed levels | Fair to poor |
| Sawhorse or 2×4 base with a thrifted top | Low | Drill, tape measure, level | Two to three hours | Fixed height | Good if braced |
| Budget height-adjustable frame plus cheap top | Moderate | Usually included, plus a screwdriver | One to two hours | Continuous, sitting to standing | Very good |
| Full build from plywood or solid wood | Moderate to high | Circular saw, drill, sander, clamps | A full weekend | Fixed or hand-crank | Very good |
Route one, the riser stack: two stacks of heavy books, a pair of milk crates, or a couple of hardwood blocks. No tools at all. Every switch means clearing your laptop, monitor and mug off the top and rebuilding the stack, so treat this as a short-term answer rather than a setup you will use daily.
Route two, the fixed base: a pair of sawhorses or a simple 2×4 frame, a reclaimed door or a thrifted tabletop, corner braces, and a few dozen screws. You need a drill, a tape measure and a level. The result never moves in height, which is fine if you have one desk for sitting and another spot for standing.
Route three, the frame: a height-adjustable desk frame sold on its own, plus a plain top from a flat-pack supplier or a secondhand door. This is where most beginners underestimate the work. Finding, sizing and attaching the top is what turns a cheap frame into a desk that takes a weekend, and it is the step most people rush.
Route four, the full build: plywood or solid lumber, a cutting saw, a sander, clamps and finish. Only pick this if you want a specific shape, extra storage or a top wide enough for two monitors, because you will spend more in time than the frame route costs in materials.
A few items are worth buying whatever route you choose: self-tapping screws rather than drywall anchors for attaching a top, a set of adjustable feet for uneven floors, and a thin anti-fatigue mat. That mat is the single cheapest upgrade on this list, and it is the difference between aching feet at the end of a standing afternoon and no complaint at all.
Step-by-Step: How to Make a DIY Standing Desk Cheaply
Step 1: Choose the Cheapest Route to Make a DIY Standing Desk Cheaply
Start by asking how often you intend to stand. If you want to try it for a week, the riser stack tells you whether standing suits your back and shoulders before you spend anything. If you already know you want it every day, skip the stack and go straight to a frame, because the switching overhead is what kills the cheap builds.
Renters should know which route is friendly to them. Riser stacks, a fixed sawhorse base and any freestanding frame leave the floor and walls untouched. Only the wall-mounted and wall-anchored options need a drill, and an anti-tip strap on a rented wall is worth skipping in favour of a wide stance and a heavier top.
Match the route to how you work. Someone who moves between two rooms twice a day wants a portable build. Someone on a two-monitor setup needs a top deep enough to hold the arms and a frame rated well above the load, because two monitors and a laptop add up fast. Someone who only wants to stand for phone calls can borrow a kitchen counter for free.
Step 2: Measure Your Space and Set a Comfortable Working Height
Your working height is your elbow height while standing with your arms relaxed at your sides, measured from the floor. That single number decides whether your build works, and almost nobody measures it before buying a frame.
Stand barefoot against a wall, let your arms hang, and measure from the floor to the bottom of your elbow. Then measure your current seated elbow height the same way. Most people find they need a range of about ten to twelve inches between the two, and that range is the whole reason an adjustable frame is worth buying.
| Your height | Standing desk surface | Seated surface |
|---|---|---|
| 5 ft 0 in to 5 ft 2 in | 38 to 39 in | 27 to 28 in |
| 5 ft 4 in to 5 ft 6 in | 40 to 41 in | 28 to 29 in |
| 5 ft 8 in | 42 to 43 in | 29 to 30 in |
| 5 ft 10 in | 44 in | 30 in |
| 6 ft 0 in to 6 ft 2 in | 45 to 47 in | 30 to 31 in |
| 6 ft 4 in and taller | 47 to 49 in | 31 in |
These are starting points, not rules. Add an inch or two if you wear thick shoes, and check that the low end of your frame’s advertised range actually reaches your seated number, not just its maximum.
Now measure the space. You need the desk width plus about two inches of clearance on each side for the frame, and enough rear clearance to sit back without hitting a wall or a radiator. Most of the complaints I see about cheap builds are not about height at all but about a desk wedged into a corner where the chair cannot fit.
Finally, check the reach. Set your monitor so the top of the screen is at or just below eye level when you stand, which usually means stacking it on a riser or clamping an arm to the rear of the top. If your elbows sit above the surface while you type, the desk is too high regardless of what the product page promised.
Step 3: Source an Inexpensive Frame and Top Without Sacrificing Stability
When you buy a frame on its own, you are buying a height range, a lifting capacity and a warranty. Everything else on that listing is marketing. Read those three numbers before anything else, because a frame that tops out below your standing height is useless no matter how good the price looks.
Check four things. The height range must cover your seated and standing numbers with room to spare on both ends. The lifting capacity should comfortably exceed what you will actually put on the desk, which for most home offices means at least twice your monitor, laptop and any other hardware. The included hardware should contain the bolts, a hex key and any controller. And the top requirements should state which thickness and screw pattern the frame accepts.
For the top itself, a plain flat-pack table, a reclaimed door laid flat, or a solid board from a salvage yard all work. A door needs its hardware removed and the edges sanded, and it is heavy enough that it improves stability on a lightweight frame. Cheap engineered tops can bow over a year if they are undersized for the span between the legs, so buy a top that is wider and deeper than the frame’s minimum.
There are two features worth paying for and one to avoid. A frame with a cross bar between the legs is worth it, because that single bar fixes most of the side-to-side wobble people complain about. A dual-motor frame is worth it for a heavy top or a two-monitor setup, since one motor will strain. Avoid frames that advertise a very low price and a very high capacity with no warranty, because the failure mode is usually a leg that drifts out of alignment under load.
Skip the accessories for now. Memory presets, collision sensors and app control are pleasant, not structural, and they add nothing to a desk that sits in one room. Add them later if you find yourself adjusting the height several times a day.
Step 4: Assemble the Frame and Attach the Desktop

Unpack the frame on the floor rather than on a table, spread out the parts, and count the bolts before you start. Assembly instructions assume you already know which bracket is front-facing, and getting that wrong means taking half the frame apart again.
Assemble the legs and feet first, sitting on the floor with the frame flat. Tighten bolts finger-tight, stand the frame up, then tighten fully. This keeps the legs square while you work, which is the difference between a frame that runs true and one that binds halfway up the height range.
Fit the cross bar if the frame has one, and check that the two leg columns are at the same height before you attach anything to the top. Stand the frame up and push firmly on each side in turn. Any movement here becomes permanent movement once the top is on, so this is the moment to loosen a bracket and correct it rather than live with it.
Protect the top where it meets the frame. A thin pad of felt tape, a strip of shelf liner or even a layer of painter’s tape between the metal bracket and the wood prevents scratches and stops the finish from marking. Screw the top on with the screws that came with the frame, working from the middle outwards so the panel draws down evenly instead of cupping.
Then check for twist. Measure corner to corner along the diagonals; they should match within about a quarter inch. A top that is slightly proud on one corner is fine, but one that rocks when you press a corner means the frame is out of square, and you should fix that now rather than after the desk is loaded with a monitor and keyboard.
Step 5: Add Bracing, Anti-Slip Feet, and Cable Management
Diagonal braces are the cheapest stability upgrade in this whole build. Two short lengths of timber screwed across the back of an open base turn a frame that sways into one that holds still, and they take about ten minutes. On a heavy sawhorse base, one horizontal rail low down does the same job and doubles as a footrest, which your legs will thank you for at the end of an hour.
Adjustable feet matter more than most people expect. Old floors and carpet tiles are uneven, and a desk with four fixed feet will rock on the two points that sit highest. Turn each foot until the frame sits flat, then push the top hard from every direction. If it still rocks, shim the low corner with a coin or a folded card before you hunt for a different build.
Run your cables before the desk is against the wall, because afterwards you will not want to move it. Bundle the monitor cable, keyboard cable and power strip together and run them along the rear cross bar, not down the back of a leg where your knees find them. A strip of hook-and-loop tape or a handful of cable ties is enough. Keep the power strip off the floor and out of any water you might keep nearby, and never route a cable across the frame’s travel path.
Under-desk storage works the same way. A shallow tray on the cross bar keeps the power brick and a spare charger out of your leg space, and if you have a keyboard tray, check that the frame’s range still clears it at your standing height before drilling anything.
Step 6: Test Stability at Sitting and Standing Heights
Test the desk loaded, not empty. Put your actual monitor, laptop and books on it, then add weight in stages: a bag of rice, then a second one, until you are roughly a third beyond your normal load. Push down on the front edge with both hands, then push from each side. A desk built correctly will not shift, creak or creep.
Run it through its full range slowly with the load on. Listen for grinding at the ends of travel, and watch the leg columns from the side to check that both sides move at the same rate. A single-motor frame under a heavy top can let one side lag, which shows up as a twist in the top rather than an obvious failure, and it gets worse with every month of use.
Any noise that sounds like a catch rather than a hum means something is binding. Lower the desk, check that a screw or a cable is not caught in the mechanism, and confirm the frame is square with a tape measure before you use the desk again. If the columns will not hold a position, treat that as a failed part and stop putting weight on the top.
Let a fixed-height build settle for a day with a full load on it. Wood moves with humidity, and a top that fit tightly in the morning can be tight against the brackets by the evening. If it has crept, back the screws off slightly rather than forcing the frame wider, then tighten them once the top has relaxed.
Step 7: Fine-Tune the Desk for Comfortable Daily Use
Stand with your feet flat and about hip-width apart, knees soft, and let your arms hang in front of you. Your elbows should land just above the surface with your shoulders relaxed. If your shoulders are up by your ears, lower the desk; if you are reaching down, raise it. Do this before anything else, because every other adjustment depends on it.
Set the monitor before you fine-tune the rest. The top of the screen should sit at or slightly below eye level, roughly an arm’s length back, with the text straight on rather than angled. On a fixed-height build, a stack of books or a clamp-on riser costs almost nothing and solves this permanently. A monitor arm clamped to the rear of the top is the better long-term answer because it also clears desk space for a laptop.
Put the keyboard and mouse directly in front of you at the same height, and keep your elbows near your sides. A keyboard tray helps only if it is wide enough to hold both the keyboard and the mouse, since reaching sideways to a mouse is a fast route to shoulder pain. A footrest is worth adding if you are shorter than your frame’s lowest comfortable position; it brings the floor up to you rather than sending you up to the desk.
Then build the switching habit. The commonly cited 20-8-2 pattern is simple: sit for twenty minutes, stand for eight, then move or stretch for two. Start slower, maybe an hour up and an hour down, and let the standing blocks get longer as your back and feet adjust. Standing all day is its own problem, and the goal is alternating rather than enduring.
A few finishing touches cost almost nothing and get used every day. A strip of light under the rear edge of the top reduces eye strain in the evening, an under-desk tray keeps the desk surface clear, and a mat in front of the frame is what makes standing long enough to become a habit.
Common Mistakes
The most common failure is a top that is too small for the frame. It looks fine in the listing and then overhangs the legs by an inch on each side, so any sideways pressure tips it. Buy a top at least as wide as the frame’s outer measurement plus an inch, and keep the overhang modest. Safety tip: the wider the overhang, the more the desk rocks when you lean.
The second mistake is mixing parts that were never designed to meet. A frame sized for a small top, brackets from a different model and legs cut from mismatched timber produce a desk that fails slowly and then suddenly. Keep every structural part from one frame, even if it means a slightly less convenient height range. Safety tip: if a bracket and a leg column are from different products, replace both rather than shimming the gap.
Uneven floors get ignored until the desk wobbles. Four feet that all assume level ground is a bad assumption, so set the adjustable feet before the first test and recheck them after a week of use. Safety tip: a desk that rocks under a keyboard is a desk you will stop trusting within a month.
Missing fasteners cause most creaks. People leave out one bolt per bracket because the frame still feels solid by hand, and the joint then works loose over months. Fit every bolt the instructions list and tighten them all again after the first week of load. Safety tip: if a bracket has a hole you cannot fill, that bracket is not doing its job.
Anti-fatigue mats get dismissed as a gimmick and then slide around on a smooth floor. A mat that moves is worse than no mat, because your feet and the whole standing position shift with it. Pick one with a textured rubber base or fix it with removable floor-safe strips. Safety tip: a mat that slides under your heels will send you off balance just as your attention drops.
Overloading is common when the desk is built as a shelf rather than a desk. Filing boxes, a printer and three monitors together can exceed what a light frame was rated for, and the failure shows up as a leg creeping out of alignment. Keep the daily load within the frame’s stated capacity and put storage on an undershelf or a separate unit. Safety tip: the printed capacity assumes the load is spread evenly, not stacked in one spot.
Routing cables down a moving column is a common shortcut that pinches wiring and puts a cable in the path of your knees. It also wears the cable out, which is harder to notice than a broken leg. Clip cables to the cross bar and keep them clear of the travel path. Safety tip: if you see a cable cross the mechanism, fix it before the first full-range test.
The last mistake is trying to convert a desk beyond what its mechanism allows. A lightweight frame with a tall, heavy top will hit the end of its travel and stay there, and forcing it strains the columns. Check the frame’s maximum load against your top and your equipment before assembly, and pick a lighter top or a stronger frame if the numbers do not line up. Safety tip: if the frame will not hold a position under load, stop using it until the part is replaced.
Frequently Asked Questions
What is the cheapest way to make a standing desk?
Stack two sets of heavy books, milk crates or hardwood blocks under the desk you already own, sized so the surface lands at your elbow height. It costs almost nothing and takes two minutes, but you rebuild the stack every time you switch position, so keep the equipment light and expect the stack to shift under a mouse. Treat it as a short-term test, not a daily desk.
Can I turn a regular desk into a standing desk cheaply?
Yes, and it is usually the best value available. The cheapest option is a riser stack under the existing top. The next step up is replacing the desk’s legs with a sold-separately height-adjustable frame, which keeps the top you already own. If the desk has thick side panels or drawers, the frame will not fit, so measure the leg-to-leg span and the underside clearance first.
How much should a budget DIY standing desk cost?
A riser build is essentially free and a fixed sawhorse or 2×4 base with a reclaimed top is inexpensive, though the tools add up if you own none of them. A frame bought on its own plus a plain flat-pack top lands in the middle and is the cheapest route that still changes height whenever you want. A full plywood or solid-wood build with storage usually costs more than a complete budget desk, once your time is counted.
How tall should my standing desk be for my height?
Measure your elbow height while standing with your arms relaxed, from the floor to the bottom of your elbow, and set the surface level with it. It usually runs a little over forty inches for an average adult and rises with your own height, so a six-footer needs considerably more surface than a five-footer. A frame that will not reach your measured number is the wrong frame, whatever its listed maximum says.
How do I stop a DIY standing desk from wobbling?
Work through four checks in order. Level the adjustable feet on an uneven floor, then measure the two diagonals of the top and correct the frame until they match. Add a rear cross bar or a diagonal brace if the frame has no lateral support. Finally, load the desk with your real equipment plus extra weight and push from the front and each side; what moves is what needs bracing, not a fatter top.
What is the 20-8-2 rule for standing desks?
It is a simple pattern for alternating positions: sit for twenty minutes, stand for eight minutes, then spend two minutes moving or stretching. The aim is variation rather than endurance, so start with shorter standing blocks and build up over a couple of weeks. Standing all day creates its own set of foot, hip and neck problems, which is why the sitting blocks stay in the pattern.
Conclusion
Whichever way you make a DIY standing desk cheaply, the same three measurements decide whether it works: your standing elbow height, the leg-to-leg span of the desk you already own and the clearance behind it. Then choose a frame whose height range covers both your sitting and standing numbers and whose capacity comfortably exceeds your equipment, and buy a top slightly larger than the frame calls for. Everything else in this guide is detail compared with those three decisions.