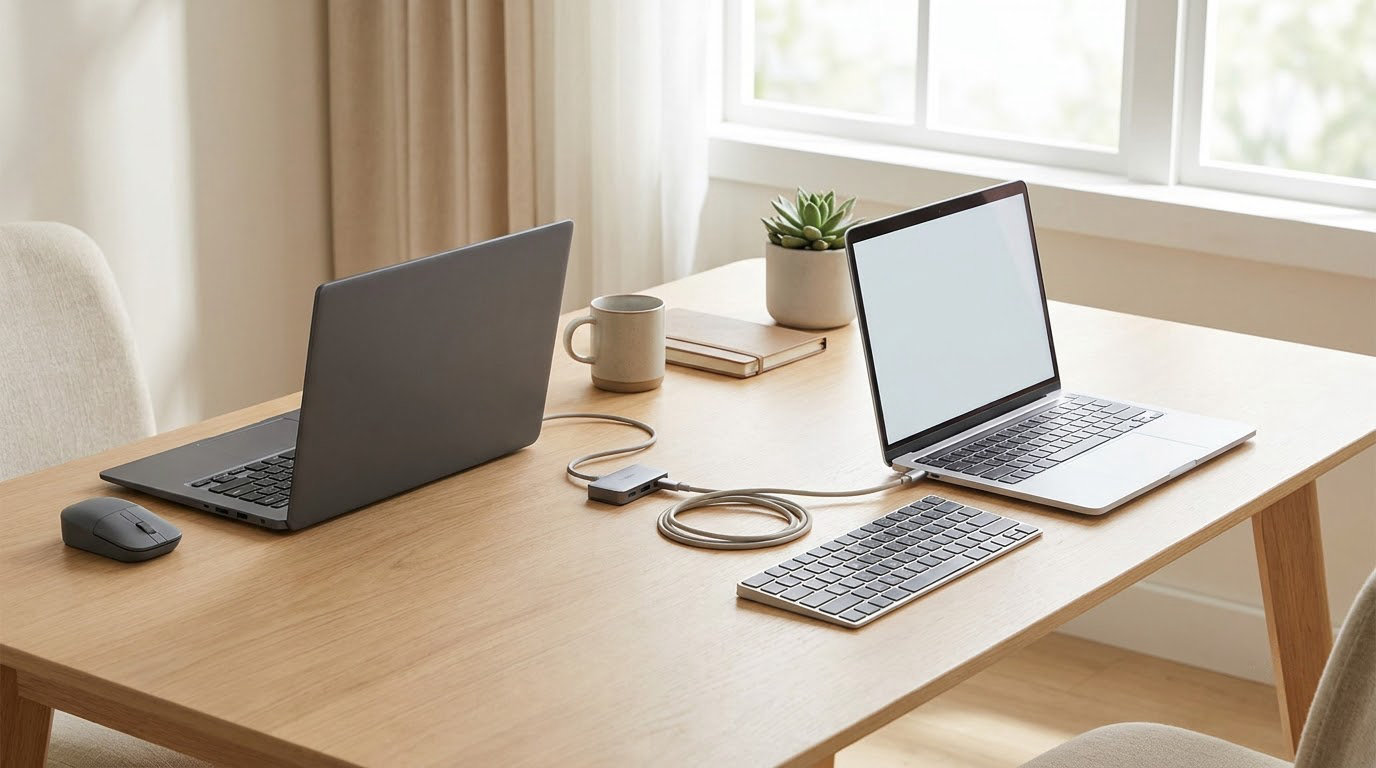
Switching from Windows to Mac without confusion comes down to two jobs: move your data with Apple’s Migration Assistant, then relearn a short list of habits that changed name, place, or meaning. The transfer takes roughly 30 to 90 minutes for a typical home setup, and the relearning is done in a week if you follow a deliberate order.
Most of the panic people feel in week one comes from about a dozen specific behaviours, not from macOS being hard. The close button does not quit an app. Ctrl does nothing where Command is expected. There is no Start menu and no cut-and-paste in Finder. Once those land in a table you can refer back to, the switch becomes routine.
This guide covers what you need before you begin, the full seven-step migration in safe order, the Windows-to-macOS translation tables, and the mistakes that cost people their only copy of a file. Menu paths are written for current macOS on Apple silicon and Intel Macs. Where behaviour differs by machine, I say so.
Table of Contents
- What You Need
- How to Switch from Windows to Mac Without Confusion, Step by Step
- Step 1: How to Switch from Windows to Mac Without Confusion by Planning First
- Step 2: Back Up Windows Before Moving Anything
- Step 3: Check Software and Hardware Compatibility
- Step 4: Use Migration Assistant to Transfer Your Core Data
- What Migration Assistant does not transfer
- Step 5: Install Apps and Reconnect Your Accessories
- Step 6: Learn the Essential macOS Differences
- Step 7: Verify the Migration and Keep Windows Available Temporarily
- Common Mistakes
- Frequently Asked Questions
- Can I move all my files from a Windows PC to a Mac?
- What should I do if an app I use on Windows is not available for Mac?
- Do I need to keep my old Windows PC after switching?
- How do I move files that Migration Assistant did not transfer?
- Can I use my Windows printer, accessories, and game library on a Mac?
- Conclusion
What You Need
The switch is far less stressful once the prerequisites are on the table. Gather these before you open Migration Assistant, because the one item most people are missing is not hardware, it is their password manager.
- The Mac, set up and updated. Finish the macOS setup screens and run Software Update first. Migration Assistant is a system utility and it wants a current build.
- An administrator login on the Windows PC. Non-system files and some application data only transfer when you are logged in as an admin. A standard account silently skips them.
- A current backup of Windows. Use File History or your existing backup tool before anything moves. This is your undo button.
- Free storage on the Mac. Migration needs room for the incoming files plus the shared folder copy. Check Storage in System Settings and clear space if the drive is near full.
- Both machines on the same network. Same Wi-Fi network, or an Ethernet cable between them. Windows usually also needs Bluetooth turned on even though the transfer runs over the network.
- Your password manager unlocked. Bitwarden, 1Password, LastPass or similar. You will need every credential for email, banking, work VPN and streaming once the old PC is gone.
- An external drive, 2 TB or larger. Time Machine cannot back up to its own internal disk, and this drive becomes your safety net for the first month.
Set aside 30 to 90 minutes for the core migration on a normal home setup. A machine with 500 GB of photos and a large mail archive can run for hours, and Migration Assistant can appear to stall partway through. That silence is not always a failure, so plan the transfer for a day when you can walk away from it.
How to Switch from Windows to Mac Without Confusion, Step by Step
Step 1: How to Switch from Windows to Mac Without Confusion by Planning First
Before a single byte moves, take an inventory. Open File Explorer on Windows and note where your real work lives, because the default folders on a new Mac do not map one-to-one onto the Windows layout.
Walk through these specific locations and write down what matters in each:
- Desktop, Documents, Downloads, Pictures, Music, Videos. These are your transfer targets, but the Mac’s versions are usually empty, so check for anything you have saved outside them.
- Browser profiles. Bookmarks and saved passwords in Chrome, Edge or Firefox sync automatically if you are signed in, but check for bookmarks you exported as an HTML file.
- Email. If you use Outlook on Windows, check whether you are on an Exchange or Microsoft 365 account (it syncs cleanly) or POP/IMAP with a local .pst file (it needs manual handling).
- Game libraries. Steam, Epic and Battle.net libraries are large and platform-locked. Note the sizes now.
- OneDrive and iCloud Drive. Files synced in the cloud can be re-downloaded rather than migrated, which saves a lot of transfer time.
Add up the sizes and compare them with the free space on the Mac. Leave headroom. If the numbers do not work, decide now which archives to move to the external drive rather than discovering it at the end.
Then run the software audit from Step 3 early, even if you are only thinking about switching. Finding out today that your line-of-business tool has no Mac version changes your decision; finding it out after you have handed back the PC does not.
Step 2: Back Up Windows Before Moving Anything
Back up the Windows PC before you back up anything else. Migration Assistant is a copy operation and copies fail, and a half-finished transfer with no source backup is the one scenario you cannot recover from.
On Windows 11, search for File History in the Start menu, open it, choose your backup drive, and select Back up now. On Windows 10, look for File History under Control Panel in the same search. Keep the drive plugged in as long as your version runs, because File History only copies changed files.
Verify the backup rather than trusting the finished message. Open the newest dated folder on the backup drive and confirm your Documents, Pictures and any work folders are physically there. Open a couple of files from it. This takes two minutes and it is the difference between a safety net and a hope.
Also photograph or list the applications you currently have installed. On Windows, press Windows key plus R, type appwiz.cpl, and press Enter to see the full list. That screenshot is how you build the install list in Step 5.
Step 3: Check Software and Hardware Compatibility
Not every Windows application exists on macOS, and some exist but behave differently. Audit your list before the transfer, not after, so you know which habits you need to change.
Work through the compatibility audit like this:
- List every app you actually use. Not every app you installed. The distinction matters, because trial utilities and old drivers are not on your list.
- Search each name in the Mac App Store. If it appears, a native version exists.
- If it does not, check the vendor site for a macOS download. Many tools that are absent from the App Store still ship a .dmg from their own website.
- If neither exists, find the replacement now. Note the name so you are not searching mid-migration.
- Check accessories in the same pass. Your printer, scanner, external drive, drawing tablet, dongle, capture card and smart home hub all need a macOS driver.
| Option | What it does | Limits |
|---|---|---|
| Boot Camp | Installs a full Windows partition on an Intel Mac | Does not exist at all on Apple silicon. This is the single most common false assumption on this topic. |
| Parallels Desktop | Runs Windows in a virtual machine alongside macOS | Licensed, and demanding on battery. Works on Apple silicon with Windows 11 on ARM. |
| CrossOver | Runs many Windows apps without a Windows licence | Not every app works. Check the vendor’s compatibility database first. |
| Cloud PC | Streams a remote Windows desktop, Microsoft or third party | Needs a steady connection. Fine for occasional use, poor for daily work. |
| Remote access to your old PC | Chrome Remote Desktop or Microsoft Remote Desktop | Only works while the old Windows machine is switched on and online. |
Note the Boot Camp row carefully if you are still deciding which Mac to buy. If your work depends on a Windows-only application, check that application against the specific Mac model before you commit. On Apple silicon, your options are virtualization, a compatibility layer or remote access, and each has a real cost in speed, money or convenience.
Step 4: Use Migration Assistant to Transfer Your Core Data

Migration Assistant is Apple’s built-in transfer tool and it lives on both machines. It pairs the Mac and the PC over your network using a one-time authorization code, then copies your data into the matching Apple apps.
On the Mac, open Applications > Utilities > Migration Assistant, or press Command plus Space, type Migration Assistant, and press Enter. Choose Prepare to transfer from another Mac, PC, or Time Machine backup. Click Continue.
The Mac will ask for a macOS administrator account, then show three options: transfer from another Mac, transfer from a PC, or restore from a Time Machine backup. Pick Transfer from another PC and click Continue.
The Mac now waits for a security code. On the Windows PC, search for Windows Migration Assistant in the Start menu and open it. The Windows app must be the current version, which it updates itself on launch. Select Prepare to transfer to a new Mac and click Next.
Enter the six-digit code shown on the Mac. If both machines sit on the same Wi-Fi network and the code is not accepted within a minute, connect them with an Ethernet cable and retry. Then sign in to the Windows admin account when prompted.
Now select exactly what to transfer. Tick Contacts, Calendar, Email accounts, Safari or browser bookmarks, and the files and folders you inventoried in Step 1. Anything unticked is not copied later, so take a second look before you continue.
Set a macOS account password for the new user if you have not already, click Continue, and confirm the security code. The transfer starts on both machines. Large libraries can take hours, and a quiet screen is not always a stalled one. Do not close either app, do not put the Windows PC to sleep, and do not unplug the Ethernet cable if you are using one.
What Migration Assistant does not transfer
This is the part Apple’s documentation buries, and it is where most post-migration surprises come from.
- Photos do not arrive in the Photos app. Your picture files land in a plain folder, usually inside your Home folder on the Mac. You import them into Photos yourself afterwards.
- Non-system files outside those folders need an admin login. Standard accounts skip them silently.
- Installed applications do not come across. macOS has no equivalent of the Windows application list.
- A local Outlook .pst archive is not converted. Mail accounts sync, but old offline archives usually need exporting and importing by hand.
- Windows browser extensions do not install. Bookmarks and saved passwords sync through your browser account, extensions do not.
- Game libraries do not move. Reinstall the launcher and point it at your existing folder.
Check the Home folder on the Mac immediately after the transfer finishes, before you do anything else. The folder is reached from the Finder sidebar.
Step 5: Install Apps and Reconnect Your Accessories
Work from your app list in the same order every time. Install the Mac version, sign in, confirm it launches, then move on. Batching twenty installations and testing them at the end is how people end up with a broken setup they cannot diagnose.
Start with the four that matter most:
- Password manager first. Install and unlock it before anything else, because every app you sign into needs those credentials. If you used a manager on Windows, keep the same one rather than starting again with Keychain.
- Browser second. Sign in to your Chrome, Edge or Firefox account and confirm bookmarks and passwords return.
- Email third. Confirm your account loads, then open a message and send a test to yourself. New accounts usually arrive after you open Mail and click Add Account.
- Work tools last. VPN profiles and corporate tools often need an administrator password during setup.
For accessories, pair Bluetooth devices from System Settings > Bluetooth, then test each one rather than assuming it connected. Printers, scanners and external drives need macOS drivers, and some models are AirPrint-compatible with no driver at all. Plug in each external drive and confirm Finder shows the expected volume and free space.
Grant only the permissions each app asks for. A file picker asking for access to your Pictures folder is normal; an app requesting full disk access with no obvious reason is worth a pause. On a corporate Mac, your IT department may already restrict what you can install at all.
Step 6: Learn the Essential macOS Differences
Getting how to switch from Windows to Mac without confusion right comes down to translation rather than relearning. Here is the mapping Windows users search for most.
| Windows | macOS equivalent | Where it lives |
|---|---|---|
| Start menu | Spotlight search and the Dock | Press Command plus Space to open Spotlight. Open Launchpad from the Dock for the app grid. |
| Taskbar | Dock | Bottom of the screen by default. Right-click it to move it to the side. |
| File Explorer | Finder | The smiling face icon in the Dock. It is the top menu bar item whenever Finder is frontmost. |
| Control Panel or Settings | System Settings | Apple menu, top left corner, then System Settings. |
| Task View | Mission Control | Control plus Up Arrow, or three fingers up on the trackpad. |
| Alt plus Tab | Command plus Tab | Hold Command and press Tab repeatedly, then release. |
| Task Manager, End task | Force Quit | Command plus Option plus Escape. |
| Recycle Bin | Trash | Bottom right of the Finder window. |
| Notification area or system tray | Control Center and the menu bar | Click the icons at the top right of the menu bar. |
| Print Screen | Command plus Shift plus 3 | Full screen. Add Control to capture a selected area instead. |
| Windows key | Command | Bottom left. Control replaces Ctrl, Option replaces Alt. |
| OneDrive | iCloud Drive | System Settings, then Apple Account, then iCloud. |
| Windows | Mac | Action |
|---|---|---|
| Ctrl plus C | Command plus C | Copy |
| Ctrl plus V | Command plus V | Paste |
| Ctrl plus X | No direct equivalent | Finder uses Command plus C, then Option plus Command plus V to move the file. Drag with the mouse instead. |
| Ctrl plus Z | Command plus Z | Undo |
| Ctrl plus S | Command plus S | Save |
| Ctrl plus F | Command plus F | Find in a document |
| Ctrl plus W | Command plus W | Close the current window |
| Alt plus F4 | Command plus Q | Quit the whole app |
| Alt plus Tab | Command plus Tab | Switch between running apps |
| Ctrl plus Shift plus Esc | Command plus Option plus Esc | Force Quit |
| PrtScn | Command plus Shift plus 3 | Screenshot to the desktop |
| Delete | Delete (backward) | Mac Delete deletes backward. Use Fn plus Delete for forward delete. |
Two behaviours cause more frustration than anything else on this list.
The red button closes a window, it does not quit the app. Clicking the red dot on an app’s window closes that window only, and the app keeps running in the background. Look at the Dock: a dot under the icon means the app is still open. To quit properly, click the app name in the menu bar and choose Quit, or press Command plus Q. This is why a freshly switched Windows user often thinks an app is frozen when it is simply still running with no windows.
Finder has no Command plus X. Windows muscle memory breaks here. Use Command plus C to copy, then hold Option and press Command plus V to move the copy to a new location. Drag and drop with the pointer is faster once your hand learns it.
Two more differences catch people out. The Delete key deletes backward like Backspace, so forward delete needs Fn plus Delete. And macOS has no middle-click on Apple hardware by default, which breaks tab closing and terminal paste. Hold Control and click with a mouse, or two fingers and a click on a trackpad, for middle-click. Install nothing for this on day one; make it a day-three fix.
Installing software also feels unfamiliar. Apps come as .dmg files that you open and drag into Applications, or as .pkg installers. There is no Add or Remove Programs list in the usual place: drag an app from Applications to the Trash to uninstall it, then empty the Trash.
Finally, set up Time Machine now, not later. Attach your external drive, open System Settings, search Time Machine, click Add Disk, and choose the drive. Turn on hourly backups. If you ever need to restore, hold the Power button, then hold Command plus the two arrow keys until the startup options appear, choose Continue, and pick Restore from Time Machine. That path is the reason Time Machine matters.
Step 7: Verify the Migration and Keep Windows Available Temporarily
Run a verification pass before you touch the old PC. Open three documents from your main work folder and check they are intact, not just present. Confirm your desktop files and your Downloads folder look right. Check for a Home folder containing transferred images and import them into the Photos app if you want them there.
Then check the rest:
- Accounts. Send and receive one test email. Confirm your calendar has the events you expected and your contacts are populated.
- Browser. Open your bookmarks bar and log into one account you use daily.
- Audio and video. Play something, then test your webcam and microphone in a real call.
- Displays. Confirm brightness and scaling look right. Text on a Mac is sharper than Windows, and most people bump it up one notch.
- Backups. Confirm Time Machine shows a completed first backup. A backup that has never run successfully is not a backup.
- Accessories. Test the printer, the external drive and any Bluetooth device you rely on.
Then set up the safety net. Install Chrome Remote Desktop on the Windows PC before you put it into storage, and on the Mac as well. You can now reach the old machine from the Mac in a window whenever you discover a missing file, without turning the whole migration into a two-machine setup you maintain forever.
Keep the old PC for at least 30 days, and longer if your company leases it on a cycle. Erase Windows only when every item on the list above checks out and your Time Machine backup has run twice. Forum advice on this topic is consistent on one point: people who hand the old machine back in week one end up buying a new external drive.
Common Mistakes
Each mistake below has a direct fix, and each one shows up over and over in the switching threads.
- No access to password manager credentials. Fix: install and unlock your manager on the Mac before anything else. If you never had one, this is the week to start, because every other account depends on it.
- Assuming every Windows app exists on macOS. Fix: run the audit in Step 3 and write down replacements before you commit. Judge the switch on the apps you truly use daily.
- Migrating with no Windows backup. Fix: File History first, and open a file from the backup to confirm it is real.
- Expecting photos to land in the Photos app. Fix: look in the Home folder after migration and import them into Photos yourself.
- Missing nested folders in the transfer. Fix: transfer whole folders, not individual files, and open each one on the Mac before closing Migration Assistant.
- Granting full disk access to apps that did not need it. Fix: grant only what each permission prompt asks for, and revisit System Settings, Privacy and Security if you are unsure.
- Quitting Migration Assistant early. Fix: leave both machines on, awake and plugged in. A large transfer can look frozen and still be working.
- Erasing Windows before verifying. Fix: run the Step 7 checklist, keep remote access active, and hold the erase until 30 days have passed.
- Remapping every keyboard key on day one. Fix: use macOS defaults for two weeks, then change only the keys that genuinely hurt. Forum consensus is clear that adapt first and install fixers second produces far less friction.
If the migration stalls completely, two paths work. Run chkdsk /F in an administrator Command Prompt on Windows and restart, then retry. If it stalls again, copy your folders to an external drive in Windows format and drag them across manually. It is slower and it works.
Frequently Asked Questions
Can I move all my files from a Windows PC to a Mac?
Almost. Migration Assistant copies your standard user folders, but it does not move installed applications, photo libraries into the Photos app, game libraries, or files sitting outside your profile. Files already in OneDrive or similar cloud storage can be re-downloaded on the Mac instead of transferred. The safest approach is to run a Windows backup first, transfer the folders that matter, then open each one on the Mac to confirm nothing is missing before you retire the PC.
What should I do if an app I use on Windows is not available for Mac?
Search the Mac App Store first, then the vendor’s own website, since plenty of tools ship a download without being listed. If neither exists, look for a replacement and decide whether it does the same job well enough. For genuinely Windows-only software, your choices are a virtual machine such as Parallels Desktop, a compatibility layer such as CrossOver, or remote access to another Windows machine. Boot Camp is not one of those options on Apple silicon Macs, because it does not exist there at all.
Do I need to keep my old Windows PC after switching?
Keep it for at least 30 days, longer if it is leased or holds anything you cannot re-download. Before storing or returning it, install Chrome Remote Desktop on the PC so you can reach it from the Mac in a window. That one step catches almost every late discovery, such as a document you forgot was saved outside your Documents folder. Only erase Windows once your Time Machine backups have run successfully and you have verified every account, folder and accessory on the Mac.
How do I move files that Migration Assistant did not transfer?
Copy them by hand with an external drive. Format it as exFAT on Windows so both machines can read and write to it, then transfer the folders in Explorer before erasing anything. You can also share a folder over your local network from Windows and open it from Finder on the Mac using Go, then Connect to Server and the network address. Large media libraries are usually faster over an external drive than over Wi-Fi. Run the Windows backup first either way, so the manual copy always has a source.
Can I use my Windows printer, accessories, and game library on a Mac?
Printers usually work best, because AirPrint covers most modern models and needs no driver at all; older and multi-function printers may need a macOS driver from the vendor. Scanners, drawing tablets and niche peripherals vary, so check each model against macOS support before you buy. Game libraries do not transfer. Reinstall the launcher such as Steam or Epic on the Mac, sign in, and point it at your existing folder on an external drive where possible. Boot Camp is unavailable on Apple silicon, so check each game for a Mac version first.
Conclusion
How to switch from Windows to Mac without confusion comes down to order. Inventory your folders and audit your software first, because those two answers determine whether the switch works at all. Back up Windows before you move anything.
Then run Migration Assistant, install your replacements in priority order with the password manager at the top, and reconnect your accessories one at a time. Learn the translation table, not the whole system: Dock for the taskbar, Spotlight for Start, Finder for File Explorer, Command for Ctrl, and Command plus Q to quit an app. Keep the old PC reachable for a month. That sequence is how people on this topic describe their first two weeks turning into a normal working setup.