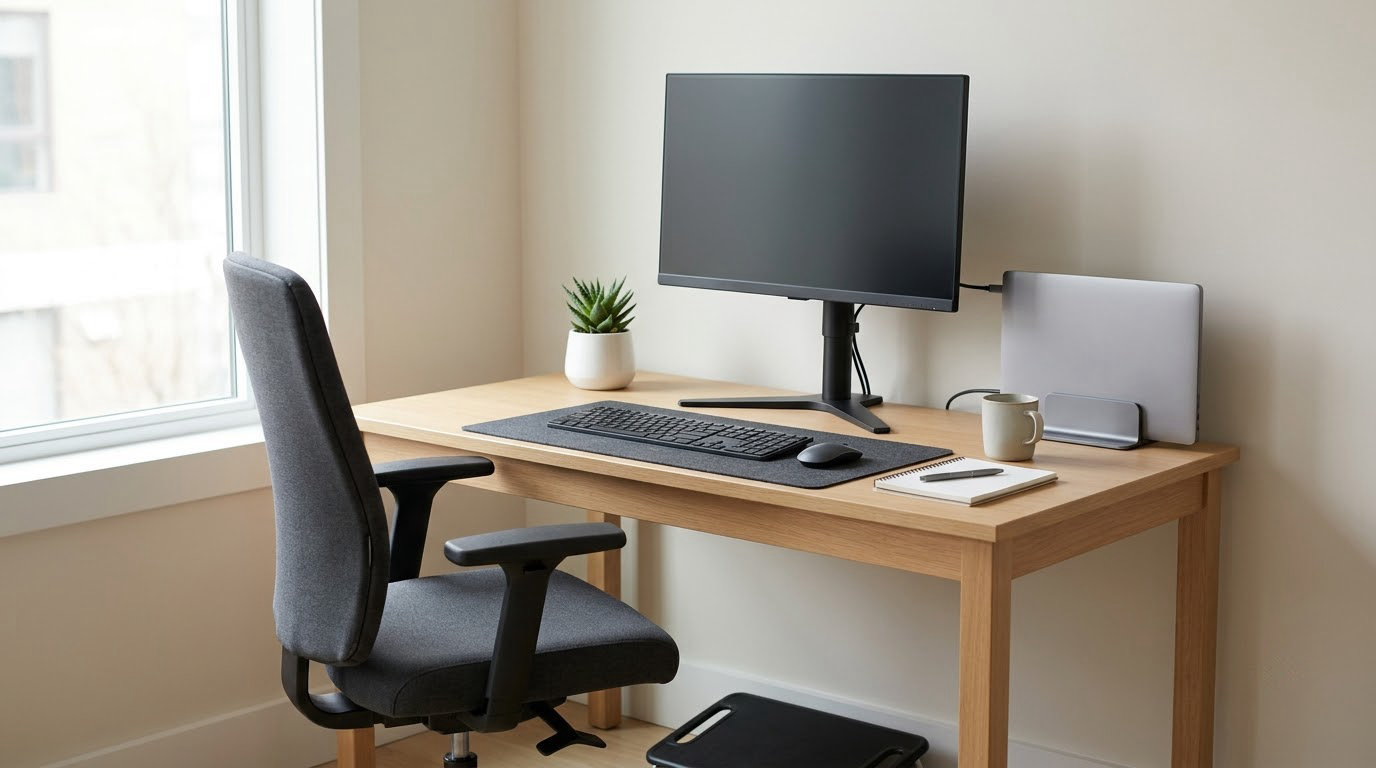
If you want one number to take away, here it is: measure the distance from the floor to your elbow crease while you are sitting or standing naturally, then set your desk so the surface you type on sits at that height. Get it right and your elbows bend to roughly 90-110 degrees, your shoulders drop, and your wrists stay flat. That is the whole method behind how to set up an ergonomic desk at the right height, and it takes about ten minutes with a tape measure.
The reason people get this wrong is that they start from a number on a chart instead of from their own body. A standard 29-30 inch desk is built for someone around 5’9"-5’11". If you are shorter, that desk forces a shrug and bent wrists. If you are taller, it forces a hunch and a forward head.
Published charts also disagree with each other, which is why desk-height calculators seem to contradict the vendor pages. Measuring yourself settles the argument in one minute. Below is the full setup, followed by fixes for desks that are already installed and cannot easily be moved.
Everything here is general workstation guidance, following what occupational health bodies such as the Canadian Centre for Occupational Health and Safety and Mayo Clinic recommend. If you have persistent wrist, neck, or back pain, get it assessed rather than adjusting around it.
Table of Contents
What You Need

You need almost nothing. A tape measure or a ruler is the main item, plus the chair you already own and about ten minutes. Everything else is optional.
Worth having before you start:
- A tape measure or a 24 inch ruler. For floor-to-elbow height, a rigid ruler works fine.
- No tape measure? Your forearm is the fallback ruler. Sit with your arm bent to 90 degrees, place your hand flat on the desk, and measure from your elbow to your fingertips. That is roughly your elbow height above the desk.
- A notebook and pen. You will measure twice and adjust once. Write the numbers down.
- Blocks or sturdy boards if your desk legs need lifting, and a footrest if your feet will not reach the floor once you raise the chair.
- A laptop stand or monitor riser if you work on a laptop, plus a separate keyboard.
Skip the anti-fatigue mat and the fancy foot roller until the desk height is right. Those solve standing comfort, not setup height, and they cannot rescue a desk set 4 inches too high.
Step-by-Step: Set the Desk and Chair for Comfort

- Set your seat height first. Sit back in your chair with your feet flat on the floor and your thighs roughly parallel to the floor. If your feet dangle, raise the chair now and add a footrest, because everything you measure next depends on this.
- Let your arms hang. Relax your shoulders and let your upper arms hang straight down beside your body. Do not hold your arms out to type.
- Bend your elbows to 90 degrees. Keep your upper arms vertical and your forearms parallel to the floor.
- Measure floor to your elbow crease. That number is your desk height. Write it down.
- Set the desk to that number. On a sit-stand desk, use the controls. On a fixed desk, you are probably a few inches away from correct, which is what the next section fixes.
- Re-seat and re-measure. Push in, relax your shoulders, and check that your forearms land flat on the surface you type on with your elbows bent.
Repeat the whole measurement standing up for the standing position. Standing elbow height is usually 12-16 inches higher than sitting elbow height for the same person.
How to set up an ergonomic desk at the right height
The target angle is an elbow bend of 90-110 degrees with the forearms level, not sloping down toward the keyboard. Set the typing surface to the elbow measurement you just took, then let the chair do the rest: seat height first so your feet are flat or on a footrest, backrest next so your lower back is supported.
Two situations need a different route. With a sit-stand desk, treat sitting and standing as two separate setups and measure both. Without an adjustable desk, the typing surface is what you control, so a keyboard tray, a low-profile typing pad, or blocks under the legs gets you most of the way there without replacing the furniture.
Recommended desk height by body height
Use this table as a sanity check, not as a substitute for measuring. If your measurement lands well outside the band for your height, measure again before you start moving furniture around.
| Your height | Sitting desk height | Standing desk height |
|---|---|---|
| 5’2" (157 cm) | 24-26 in (61-66 cm) | 37-39 in (94-99 cm) |
| 5’6" (168 cm) | 26-28 in (66-71 cm) | 39-41 in (99-104 cm) |
| 5’10" (178 cm) | 27-29 in (69-74 cm) | 41-43 in (104-109 cm) |
| 6’2" (188 cm) | 29-30 in (74-76 cm) | 43-45 in (109-114 cm) |
| 6’4"+ (193 cm+) | 30 in (76 cm) | 45-46 in (114-117 cm) |
Two things worth knowing about these numbers. Published charts vary by a couple of inches because they measure different surfaces, which is why calculators disagree. And footwear changes the answer: the heels you wear at the office produce a different standing height than flat shoes at home. Measure in the shoes you actually work in.
How to set the monitor once the desk is right
Your desk height is fixed now, so the monitor has to work around it rather than the other way around. The target is a sight line between horizontal and about 30-35 degrees below eye level, at roughly arm’s length, which is 20-28 inches.
- Top of the screen at or slightly below eye level when you look straight ahead.
- Screen an arm’s length away, roughly the length of your outstretched arm.
- If your monitor sits on the desk and forces you to look up or down sharply, put it on a riser or a monitor arm instead. A monitor arm clamps to the desk edge, so it raises the screen without raising the keyboard.
- If you use two monitors, put the primary one directly in front of you and the secondary one beside it at the same height, angled inward.
That riser-versus-keyboard conflict is the classic trap. People prop up the laptop, then the keyboard sits too high, then they add a wrist rest, then their wrists hurt more. If your screen needs to be higher than the desktop allows, fix the screen with an arm or riser and keep the typing surface where your elbows say it belongs.
For keyboard and mouse: keep the keyboard flat and close enough that your elbows stay near your sides rather than reaching forward. Keep the mouse on the same plane and close to the keyboard, and move it with small forearm motions instead of shoulder ones.
Chair, footrest, and lumbar support
With the desk set, the chair becomes a variable you adjust to match it. Set the seat so your knees are at about 90 degrees, feet flat or on a footrest, and back supported. Leave a two or three finger gap between the front edge of the seat and the back of your knees. Adjust the backrest so your lower back is supported rather than arched over it.
Lower back support matters most when the desk pushes you forward, which is exactly what happens when the desk is too high. Fix the height first, then the chair usually stops being a problem.
Standing desks: height and how often to switch
For standing work, set the desk at your standing elbow height the same way, with forearms horizontal and wrists neutral. Wear supportive footwear and stand on an anti-fatigue mat, which encourages you to shift your weight instead of locking into one stance.
On frequency, the widely cited pattern is 20-8-2: for every 30 minutes of work, spend 20 minutes on a task, 8 minutes actively moving such as walking or stretching, and 2 minutes looking away from the screen. Change position roughly every 30 to 60 minutes. When you first start standing, build up slowly, and treat it as a movement tool rather than a virtue. Standing all day is its own strain.
Common Mistakes
Most of the pain people blame on their chair comes from desk height that was never calibrated. These are the errors I see most often, with the fix for each.
The desk is too high
Signs: shoulders shrugged up toward your ears, wrists bent upward as you type, forearms sloping down toward the keyboard, and a dull ache in the shoulders by mid-afternoon. Work down this list from least to most invasive and stop when your shoulders drop.
- Raise the chair and add a footrest. This fixes the keyboard height in about two minutes and costs almost nothing. Check that your forearms are level with the surface.
- Lower the typing surface only. A keyboard tray brings the keyboard down without touching the desk. This is the right fix when the desk itself is fine and only the typing feels high.
- Use a low-profile typing pad if you cannot install a tray. Several people with wrist problems use this to shave an inch or two off the effective typing height.
- Lower the desk top if it is a sit-stand model that will not go low enough. Many adjustable frames bottom out around 28 inches, which is too high for anyone under about 5’6".
If none of that gets you there, the desk is built for a different body and replacing it is the honest answer. Users in home office forums keep repeating the same lesson: buy the chair second, calibrate the desk first.
The desk is too low
Signs: leaning forward, rounded shoulders, neck craned to look down at a laptop, and lower back ache by the end of the day.
- Raise your chair and use a footrest if your feet no longer reach the floor.
- Put sturdy blocks or boards under the desk legs. This is the standard occupational-health recommendation for a fixed desk that is too low, and it costs very little. Measure the gap first, then buy blocks to match.
- Add a desk riser that lifts the whole top by 4-8 inches.
- Swap in a taller chair if the gap is small, or a sit-stand desk if the gap is large.
Using a laptop as your only screen
A laptop screen and a laptop keyboard cannot both sit at their correct heights on one flat surface. You either crane your neck down to the screen or raise the laptop and type into the air. The workable version is a laptop stand plus a separate keyboard and mouse, with the screen near eye level and the keyboard back at elbow height.
Wrist rests and other small errors
A wrist rest is for resting between bursts of typing, not for parking your wrists while you type. Resting on it while you work takes the support away from the muscles that need it, which can make wrist problems worse. Also check that your feet are actually on the floor, that your monitor is not off to one side, and that your chair back is doing something rather than sitting unused behind you.
A five-minute calibration check
- Feet flat or on a footrest, knees near 90 degrees.
- Forearms level, elbows bent 90-110 degrees, shoulders relaxed.
- Wrists flat, not bent up or down.
- Screen at or just below eye level, an arm’s length away.
- Mouse close to the keyboard, same plane.
- Lower back supported.
Run that list again whenever something changes: a new chair, different shoes, a moved monitor, or a switch between sitting and standing. Heights that worked last spring are not automatically right now.
New posture usually feels strange for a few days. That is normal and not a reason to abandon the adjustment, but do give it a week before you decide.
Frequently Asked Questions
What is the ideal height for an ergonomic desk?
The ideal height is whatever puts your keyboard surface level with your elbow crease. Sit or stand with your arms hanging naturally, bend your elbows to 90 degrees, and measure from the floor to your elbow. That measurement is your number. For most adults it lands between 27 and 30 inches sitting and 42-46 inches standing.
Is 30 inches too high for a desk?
For anyone under roughly 5’9u0026quot;, yes. Thirty inches suits people near 5’10u0026quot;-6’0u0026quot; sitting, and it is the reason many adjustable frames feel too tall. If 30 inches leaves your shoulders shrugged and your wrists bent upward, raise your chair, add a footrest, or fit a keyboard tray. Measure your own elbow height rather than trusting a chart.
How tall should a desk be for a 5’3u0026quot; person?
A person around 5’3u0026quot; usually lands near 24-26 inches sitting and 37-39 inches standing. That is below the range of many adjustable desks, which bottom out around 28 inches. The fix is a chair with a low seat plus a footrest, a keyboard tray, or a desk riser with blocks under the legs. Measure your own elbow height to confirm.
What is the 90-90-90 rule in ergonomics?
It is a quick check on a seated setup: your elbows at 90 degrees, your hips at 90 degrees, and your knees at 90 degrees. If all three hold with relaxed shoulders and flat feet, your desk and chair heights are working together. It is a coarse check, not a rule carved in stone, so adjust for comfort rather than forcing the angles.
How do I fix a desk that is too high without buying a new one?
Work upward from the cheapest fix. Raise your chair and add a footrest, then fit a keyboard tray to lower just the typing surface, then use a low-profile typing pad. If the desk top itself is the problem and it will not go lower, lift your feet with a footrest and add a monitor arm so the screen can still reach eye level.
How often should I adjust my desk and chair?
Recheck whenever your setup changes rather than on a fixed schedule: a new chair, different shoes, a new monitor position, or moving to a standing desk. As a working habit, change position every 30 to 60 minutes, and look away from the screen for about 20 seconds every 20 minutes. Sitting and standing both have limits, so the switch matters more than either position alone.
Conclusion
Start with the measurement, not the furniture. Sit down properly, let your arms hang, bend your elbows to 90 degrees, and note the floor-to-elbow distance. That single number is how to set up an ergonomic desk at the right height for your body, and it takes a minute.
Adjust the workstation to fit you rather than copying a height that works for someone else. Small changes, guided by how your shoulders and wrists feel at the end of the day, matter far more than any particular number in inches.